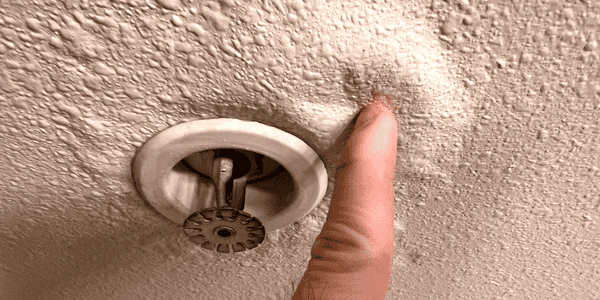
Popcorn ceilings may not be the trendiest design choice, but they’re still a familiar sight in countless homes. While they have their quirks, one thing’s for sure—they don’t handle water damage well. Stains, sagging, and peeling can quickly turn your ceiling into an eyesore. The good news? You can fix water damage on popcorn ceilings. It isn’t as daunting as it sounds. With the right approach and tools, you can repair it effectively and bring your ceiling back to its former glory. In this guide, we’ll break down every step to help you tackle the damage with confidence.
1. Spotting the Problem: How to Identify Water Damage on Popcorn Ceilings
The first step to repairing water damage is recognizing it. Here’s what to look for:
- Stains and Discoloration: Yellowish and brown patches on the ceiling are key signs of water damage.
- Peeling or Flaking Texture: When moisture seeps into the popcorn texture, the material can start to peel, flake, or crumble.
- Bulging or Sagging Ceilings: This is a more severe indicator, suggesting trapped moisture or structural damage.
Act quickly once you notice these signs. Left untreated, water damage can worsen, leading to mold growth or structural issues that are significantly harder (and costlier) to repair.
2. Preparation is Key: Gearing Up for Success
Before diving into the actual repair work, make sure you have everything you need:
What You’ll Need
- Drop cloths or tarps
- Safety goggles and a dust mask
- A scraper or putty knife
- Textured patch spray
- Primer and paint
- Plastic sheeting and painter’s tape
Safety First
Repairing popcorn ceilings can stir up dust, which may contain hazardous materials like asbestos in older homes. Wear protective gear and ensure the area is well-ventilated. If you suspect asbestos, call in a professional for testing and removal.
Prepping Your Space
Cover all furniture and flooring beneath the repair with your tarps or drop cloths to catch falling debris. Secure them with painter’s tape to keep them in place. Remove or cover light fixtures to avoid accidental damage.
3. Out with the Old: Removing Damaged Sections
Once your space is prepped, it’s time to scrape away the damaged sections:
A Step-by-Step Process
- Lightly wet the damaged area with a spray bottle. This softens the material and minimizes dust.
- Use a scraper or putty knife to gently remove the damaged popcorn texture. Work carefully to avoid scraping too far into the drywall underneath.
- Be mindful of the boundaries of the damage. Scraping too far can increase the area you’ll need to repair.
Pro Tip: Hold a small tray underneath as you scrape to catch debris and reduce cleanup time.
4. Tackling the Root Cause: Addressing the Source of the Water
Before you rebuild, it’s important to figure out what caused the water damage and fix it. Otherwise, your repairs will be short-lived.
Address the Source
Check for leaky pipes, roof issues, or faulty appliances that may have caused the damage. Repairing these problems ensures you won’t face recurring issues in the future.
Dry the Area
Ensure the ceiling is completely dry before proceeding. Use fans or a dehumidifier to hasten the drying process.
Prevention Tips
- Inspect your roof and plumbing regularly.
- Keep gutters clear of debris to avoid overflow.
- Fix minor leaks promptly to prevent bigger problems later.
5. Rebuilding the Texture: Restoring the Popcorn Effect
Now comes the fun part—restoring that classic popcorn texture:
Recreate the Texture
Use a textured patch spray designed for popcorn ceilings. Shake the can well and test it on a piece of scrap cardboard before applying it to your ceiling. Spray lightly in even layers, building up the texture gradually to match the existing pattern.
Blend the Edges
Feather the edges of the new texture into the old for a seamless repair. Use a damp sponge to smooth any harsh lines before the spray dries.
6. Finishing Touches: Painting and Priming for Perfection
With the texture restored, you’re almost done!
Prime the Surface
Primer is essential for ensuring the new texture adheres properly and that any previous stains don’t bleed through. Choose a stain-blocking primer for the best results.
Paint to Match
Select a flat or matte ceiling paint that matches the existing color of your ceiling. Apply with a roller for even coverage, making sure to blend edges carefully.
7. When to Call in the Pros: Knowing Your Limits
Sometimes, tackling the repair yourself isn’t feasible. Call professionals if:
- The damage extends over a large section or multiple rooms.
- You suspect asbestos in your popcorn ceiling. (Read more form the EPA about asbestos exposure.)
- The source of the leak is too complicated to fix on your own.
At Complete Flood Restoration, we specialize in large water damage repairs and can restore your home quickly and safely. Contact us today—we’re here to help!
8. Exploring Alternatives: Should You Fix Water Damage on Popcorn Ceilings or Remove It?
Love it or hate it, popcorn ceilings are polarizing. If you’re tired of their look, this could be a great opportunity to upgrade. Consider flat, smooth ceilings, or opt for modern textures like knockdown finishes.
9. Final Thoughts: Celebrate and Protect Your Work
Fixing a water-damaged popcorn ceiling may seem daunting, but with the right tools, knowledge, and persistence, it’s entirely manageable. Following these steps will restore your ceiling while preventing future issues. Celebrate your DIY success and take steps to avoid water damage in the future!
Need help? Complete Flood Restoration can provide expert assistance for all kinds of water damage issues. Call us now for a free estimate or emergency service!
Complete Flood Restoration – Your trusted family-owned restoration experts in San Antonio.
