Call 726-227-2829
Complete Flood Restoration Logo
how much water does it take to cause water damage

You’re enjoying a quiet day at home when suddenly you notice water pooling around your kitchen sink. Whether it’s a burst pipe, a leaking pipe under the sink, or an appliance malfunction, you now have a serious situation on your hands. 

How much water does it take to cause water damage? And how quickly can water wreak havoc on your home?

In this post, we’ll walk you through how water causes damage, how long it takes for water to ruin things, and how fast you need to act to save your home. 

As homeowners in San Antonio know all too well, water intrusion can happen at any time—from a severe storm to a small leak from a kitchen faucet. Water is one of the most destructive forces for your home, but with the right knowledge and a quick response, you can minimize damage and prevent bigger issues down the line.

Let’s dive in.

How Much Does It Take to Cause Water Damage?

You may be surprised to learn that how much water does it take to cause water damage doesn’t necessarily mean a flood or a torrential downpour. The damage depends on several factors—like the type of water, how long it sits, and what materials it comes into contact with.

Minor Damage from Small Leaks

A small leak can cause minor damage over time. Picture this: a leaking pipe under your bathroom sink that drips a bit of water each day. While it may not seem like much at first, this water can slowly seep into the wood of your cabinets or drywall, causing warping or mold growth. How quickly does this happen? If left unchecked, water can start to cause damage within the first 24 hours, leading to long-term issues.

Resource: San Antonio Water System: How to Detect Leaks

Moderate Damage from Appliance Malfunctions

how much Water can cause water damage small leak burst Pipe Repair

Water doesn’t have to be a torrent to do damage. Appliance malfunctions, like a dishwasher overflow or a leaking washing machine, can cause moderate damage if not addressed quickly. These types of water issues may not flood your home, but they can certainly lead to visible damage—water pooling around appliances or seeping under the floorboards. If water is left to sit for too long, you’ll start dealing with standing water that seeps into flooring, causing structural damage.

Significant Damage from Burst Pipes and Flooding

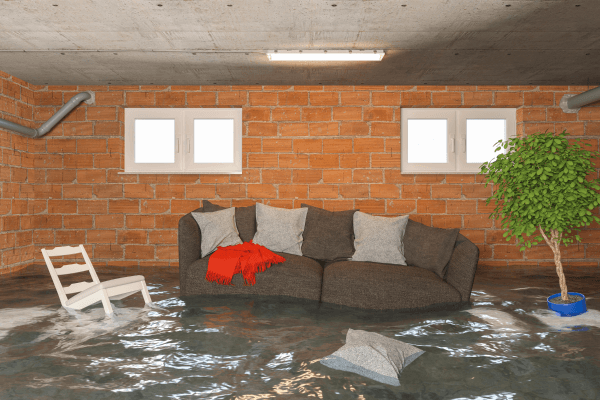
Now, let’s talk about extensive flooding. A burst pipe or flooded basement from a severe storm can unleash a large amount of water in a short amount of time. This is when you’ll see visible damage right away—wet carpets, soaked drywall, or flooded rooms. In cases like this, the damage can escalate quickly, especially if the water continues to rise or if the water has been standing for too long. The key here is speed: how fast can water cause damage? The answer is, very fast—especially if you don’t get on it right away.

How Fast Can Water Cause Damage?

Water damage can happen shockingly fast. That’s why it’s important to act quickly when water starts seeping into your home. Even a small leak can cause serious damage in just a few hours. Here’s how quickly different types of water damage can progress:

In the First 24 Hours: The Clock Is Ticking

Within the first 24 hours of water exposure, mold and mildew can begin to grow. This can lead to both health issues and long-term structural damage. Water can also start to warp wood and saturate drywall, making it brittle and prone to collapse. The longer you wait, the worse the structural damage can get. If you don’t extract the water quickly, it will keep seeping deeper into your materials, making water damage repair more expensive and time-consuming.

48-72 Hours: The Damage Gets Worse

If you haven’t addressed the issue within 48-72 hours, the effects become more significant. Standing water can weaken the foundation of your home, and your flooring could start to buckle or warp. Electrical problems may also arise, as water reaches electrical outlets, wiring, and appliances. At this stage, it’s essential to start water extraction immediately to prevent further complications.

Beyond 72 Hours: Significant Damage

If water has been allowed to linger for more than three days, you’re looking at extensive flooding that may require full renovations. By now, mold growth is likely to be widespread, and it may have spread behind walls, under floors, and into hidden corners of your home. This isn’t just a “quick fix” situation—it’s going to require serious cleanup and professional water removal to ensure your home is restored safely.

Factors That Influence How Quickly Water Causes Damage

Several factors influence how fast water causes damage. Understanding these factors will help you act quickly when it matters most.

The Type of Water

Not all water is created equal. For example, gray water (from your washing machine or dishwasher) may contain contaminants, while black water (from a sewage backup or flood) is highly hazardous and can cause more significant damage. Black water needs to be handled by professionals, as it can bring in bacteria, viruses, and mold spores.

How Much Water Is Involved

Naturally, more water causes more damage. A small leak may only dampen a small area, but a burst pipe or flooding can lead to widespread issues. The more water that enters your home, the harder it will be to extract water effectively, and the more damage it can do.

The Materials Affected

Some materials are more susceptible to water damage than others. Wood, drywall, and insulation are particularly vulnerable. These materials absorb moisture quickly, which can lead to structural damage in no time. Vinyl flooring or ceramic tile, on the other hand, might resist water to some extent, but the damage to other areas (like subfloors) can still be severe.

Humidity and Temperature

Humidity levels play a big role in how fast water spreads and how quickly damage occurs. In areas with high humidity, like San Antonio, water can soak into materials faster. This makes it more likely for mold to grow if the area isn’t dried properly. On the flip side, low humidity can cause wood to dry out and crack, leading to different types of damage.

What You Can Do to Prevent Water Damage

As we’ve seen, water damage can happen quickly, but there are steps you can take to protect your home and prevent major issues.

Regular Inspections

The best way to prevent water damage is to catch it early. Inspect your plumbing regularly, check appliances for leaks, and make sure your roof and gutters are free of debris. If you notice minor damage, address it right away to prevent it from escalating into something more serious.

Install Water Detection Devices

Consider installing water leak detectors in areas like under sinks, near appliances, and in your basement. These devices will alert you immediately when they detect water, allowing you to address the problem before it becomes a big issue.

Proper Drainage

Make sure that water is properly draining away from your home. Gutter cleaning and ensuring your landscaping directs water away from your foundation can go a long way in preventing flooding.

Keep Your Home Well-Ventilated

Good airflow helps prevent moisture buildup. Use fans or dehumidifiers in areas prone to humidity, like basements and attics. This helps keep things dry and prevents water from lingering long enough to cause damage.

When to Call the Professionals

If water has already caused significant damage or if you’re dealing with black water, it’s time to call the experts at Complete Flood Restoration. Water damage repair requires the right equipment and expertise to ensure your home is properly restored.

Our team can handle water extraction, dry out your home, and address mold or structural damage that may have occurred. We understand how overwhelming water damage can be, but we’re here to make the restoration process as smooth and efficient as possible.

Don’t Wait—Act Fast to Minimize Damage

How fast can water cause damage? The answer is, very fast. Whether it’s a small leak or a burst pipe, water can do a lot of harm in a short amount of time. But with the right steps, you can minimize damage and get your home back to normal.

The key is to act quickly. The sooner you shut off the water, remove standing water, and start drying out the affected area, the less likely you are to experience extensive flooding or structural damage. And if things start to get out of hand, remember, Complete Flood Restoration is here to help you every step of the way. We’ve been serving San Antonio for over 20 years, and we know exactly how to handle water damage situations.

Call Complete Flood Restoration today if you’re dealing with water damage. We’ll make sure your home is restored quickly and professionally—so you can get back to your routine with peace of mind.

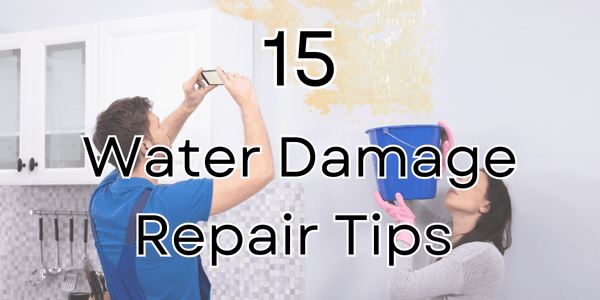
15 water damage repair tips

15 Essential Water Damage Repair Tips: Protect Your Home and Save Money!

Water damage is one of those problems every homeowner dreads—especially when it happens unexpectedly. Whether it’s from a burst pipe, a leaky roof, or a freak storm in San Antonio, a flooded home can be a nightmare. But don’t panic just yet! We’ve got you covered with these 15 essential tips for water damage repair that will help you take control of the situation and minimize the damage.

With over 20 years of experience in water damage restoration, we at Complete Flood Restoration have seen it all. Water damage can escalate quickly, so acting fast is key. We’ll cover pro tips from the first critical step to shut off the water at the source to how to remove excess water before it causes more harm. Whether you’re dealing with a small leak or something more severe, these steps will help you navigate the process with confidence. Let’s dive into it!

1. Shut Off Water and Electricity to Protect Your Home

found a leak- shut off water supply

The first thing you need to do is stop the water from coming in. If a burst pipe or appliance is the culprit, locate the main water shutoff valve and turn it off. If you’re unsure where it is, make sure you find it ahead of time, because every second counts.

Then, immediately turn off the power in the affected areas—water and electricity do not mix well! This will prevent the risk of electrical shocks and further damage.

By shutting off both the water and electricity, you’re giving yourself a much safer environment to work in while you assess the damage.

2. Identify the Source of the Water

Once the immediate risks are under control, you need to figure out where the water’s coming from. Is it a burst pipe, an overflowing sink, a broken dishwasher, or perhaps a roof leak after a storm? Knowing the source will help you address the issue more effectively.

  • Broken Pipe? If you have a leak in the pipes, turn off the water and inspect the area for any visible cracks or holes.
  • Overflowing Sink or Toilet? Try to stop the flow by shutting off the appliance’s water supply or the valve underneath your sink.
  • Roof Leak? If the water’s coming from above, you’ll want to identify the problem as soon as possible. The faster you address it, the less damage your ceilings will take.

If you’re unsure, don’t hesitate to call a plumber or restoration professional. In San Antonio, we know how quickly leaks can escalate—act fast to prevent further issues.

Read more: 5 Urgent Warnings of Damaged Water Lines That Could Cost You Thousands

3. Remove Excess Water Immediately

Water removal is the name of the game. The quicker you remove standing water, the less time it has to seep into materials like drywall, wood, and flooring. This will help prevent long-term structural damage and mold growth.

  • Wet/Dry Vacuum: If you’ve got one, now’s the time to put it to good use. Start sucking up the water from carpets, rugs, and the floors.
  • Towels and Mops: If you don’t have a vacuum, grab towels, rags, or a mop to start soaking up as much water as possible. The sooner you get to this, the better.

You might feel like you’re fighting an uphill battle, but remember: every minute counts. The faster you start drying things out, the less damage you’ll have to repair.

4. Dry the Affected Area

Once the bulk of the water is removed, drying out the space is crucial. Leaving water-soaked areas can lead to mold, mildew, and even structural damage. Here’s what you can do:

  • Open Windows and Use Fans: Let the air flow! Open any windows in the affected area to help with ventilation. You can also place fans in the space to circulate air and speed up the drying process.
  • Rent a Dehumidifier: If the damage is significant, renting a high-capacity dehumidifier will help pull out any remaining moisture from wood, carpets, and walls.
  • Take Your Time: Drying things out can take time, so don’t rush it. You want to ensure the area is thoroughly dried out before moving on to repairs.

We know it can be frustrating, especially if you’re eager to get things back to normal. But taking the time to properly dry out the affected area will save you from bigger problems down the road.

5. Remove and Replace Damaged Materials

Some materials won’t be salvageable after water damage, especially if they’ve absorbed too much moisture. Porous materials like carpet, insulation, and drywall often need to be replaced.

  • Carpets and Padding: If they’ve soaked up water, they’re likely damaged beyond repair. If the water has reached deep into the padding, it’s time to toss it and install new flooring.
  • Drywall: Waterlogged drywall can lose its structural integrity and start to sag or soften. You’ll need to cut out and replace any damaged portions.
  • Insulation: If your insulation has become wet, it will need to be replaced as well to prevent mold growth and to restore proper insulation in the space.

Don’t try to save things that can’t be saved. In the long run, replacing damaged materials will save you a lot of headaches and prevent mold from taking hold.

6. Check for Mold and Mildew

Mold and mildew can start growing as quickly as 24-48 hours after water damage, especially if the area is left damp. If you see mold growing on the walls, under carpets, or in hidden corners, it’s crucial to handle it immediately.

  • Inspect Hidden Areas: Look behind appliances, under sinks, or inside cabinets for signs of mold.
  • For Small Mold Growth: You can use a mixture of bleach and water (1:10 ratio) to scrub the affected area. Always wear gloves and a mask to protect yourself.
  • For Serious Mold Problems: If you notice extensive mold or mildew growth, it’s best to call in professionals who can properly address the situation and prevent it from spreading.

San Antonio’s humidity doesn’t help mold growth, so take action fast to avoid a bigger problem.

7. Disinfect the Area

Once the moisture is under control, disinfecting the space is key to keeping your home safe and clean. You don’t want lingering bacteria or contaminants.

  • Use a Bleach Solution: Mix one part bleach to 10 parts water to disinfect surfaces, especially areas that came in contact with contaminated water (like floodwater).
  • Natural Cleaning Options: If you prefer to avoid bleach, you can use vinegar or hydrogen peroxide, which are also effective at killing bacteria and mold spores.
  • Don’t Forget the Air: Use an air purifier or additional fans to ensure that any airborne particles are filtered out.

This step will ensure that your home is clean, safe, and ready to move forward with repairs.

8. Address Damaged Wood and Flooring

Waterlogged wood can swell, warp, or rot, and should be replaced promptly. If your floors have been affected, here’s what to do:

  • Wood Floors: Check for swelling and warping. If the boards are severely warped or buckled, they will need to be replaced.
  • Other Flooring: If water has gotten under tiles or laminate, you’ll need to remove the flooring and ensure the subfloor is dry. Sometimes, you can salvage tile floors, but laminate will need to be replaced.

If the water damage is extensive, it’s worth consulting with professionals who specialize in water-damaged floors.

9. Repair and Replace Damaged Drywall

After water damage happens, drywall is often one of the first things to be affected. If it’s swollen, soft, or falling apart, it’s time for replacement.

  • How Much to Replace: If the drywall is sagging more than 3/8 of an inch or you notice discoloration, it’s time to replace it.
  • Cut Out Damaged Areas: You can cut out small damaged sections and replace them. For larger sections, it’s best to replace the entire sheet of drywall to ensure structural integrity.

Once the drywall is replaced, you can paint and make your kitchen or living space look as good as new.

10. Inspect and Repair External Siding

External siding can also be affected by water damage. If your siding is warped, cracked, or if water has seeped behind it, you need to address it quickly.

  • How to Check for Water Damage Behind Siding: If you notice warped or discolored siding, it could be an indication that water is seeping behind it, leading to further issues with mold and decay.
  • Replace Damaged Siding: If you’ve got significant damage, replace the affected siding as soon as possible. Not only will this restore your home’s appearance, but it will also prevent long-term issues.

11. Seal and Paint Your Repairs

Once all the water damage repairs are done, seal and paint the areas that were damaged. This not only improves the aesthetics but also protects your home from future issues.

  • Caulking: Use caulk to seal seams around windows, doors, and other areas that may be vulnerable to water infiltration in the future.
  • Repaint: After replacing drywall and other materials, apply a fresh coat of paint to restore your home’s appearance and protect the surfaces from water damage.

Read more: #1 Trick You’re Overlooking That Could Prevent Basement Floods (+4 Flood Prevention Mistakes to Avoid)

12. Check Your Insurance for Water Damage Repair Coverage

If the damage is significant, don’t forget to check with your homeowner’s insurance. Coverage for water damage varies depending on the cause of the flood.

  • Know What’s Covered: Some policies cover burst pipes, but others may not cover damage from flooding or slow leaks. Be sure to contact your insurance provider as soon as possible.
  • File a Claim: Document all damage, including photos and a detailed account of the incident, and file your claim promptly to avoid delays.
  • You can read more here about the National Flood Insurance Program

Also, check out our blog posts about insurance coverage:  Does Homeowners Insurance Cover Water Damage Restoration?  |  Does Renters Insurance Cover Water Damage? What You Need to Know

13. Call in the Pros if the Damage Is Extensive

If the damage is widespread or you’re unsure of how to handle things, it’s time to call in the experts. Professional water damage restoration teams can handle the tough stuff, from removing large amounts of water to restoring your home’s structure.

Complete Flood Restoration is here for you, whether you need help cleaning up, storing your valuables, repairing, or restoring your home to its pre-damage condition. With years of experience in San Antonio, we know how to handle it all.

14. Prepare for Future Water Damage with Smart Prevention Measures

Once your home is back to normal, take steps to prevent future water damage:

  • Install Sump Pumps: These help to remove excess water from the lowest part of the home, like to prevent basement flooding during heavy rains.
  • Inspect Roof and Gutters Regularly: Keep your roof and gutters in tip-top shape to prevent leaks.
  • Check Pipes Regularly: Have a plumber inspect your pipes for wear and tear to avoid future leaks.
  • Read more from the blog: Is your water damage emergency plan up to date?

15. Stay Calm, and Take Action Quickly

The most important thing to remember when facing water damage is to stay calm. The faster you act, the less damage you’ll have to deal with. By following these 15 tips, you can save your home from further destruction and get it back to normal as soon as possible.

Conclusion: Don’t Wait—Contact Complete Flood Restoration

Water damage doesn’t have to be a nightmare if you act fast. Following these 15 tips will help you minimize damage, protect your home, and get things back to normal in no time. If you ever find yourself overwhelmed or unsure how to attack damaged drywall, don’t hesitate to reach out to Complete Flood Restoration. We’re here to help San Antonio homeowners recover from water damage quickly and safely.

Give us a call today, and let us help you restore your home!

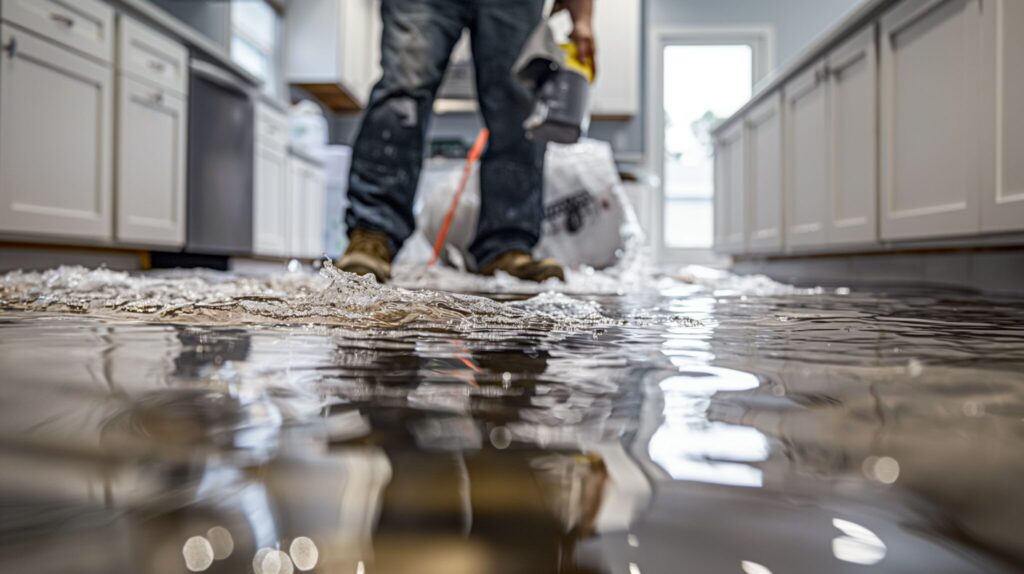
what to do in a kitchen flood- flooded kitchen

A flooded kitchen can turn a normal day into a stressful mess in minutes. Whether it’s caused by a burst pipe, a leaky dishwasher, or an overflowing sink, water damage can escalate quickly if not addressed immediately.

So, what should you do when faced with a sudden kitchen flood? 

First things first—don’t panic! We at Complete Flood Restoration know how overwhelming this can be, but you can absolutely handle the situation before professional help arrives. With a little quick thinking and action, you can minimize the damage, protect your belongings, and make sure your home stays safe.

So, let’s walk through the steps you need to take when your kitchen is flooded—because trust us, waiting around won’t fix the issue, but taking quick action will. 

Here’s How To Dry A Flooded Kitchen:

1. Safety First: Assessing the Situation

When water starts flooding into your kitchen, your first instinct might be to grab a mop and start cleaning. But safety comes first. Here’s what to check before you do anything:

  • Turn Off the Electricity: If it’s safe to do so, head over to your breaker box and turn off the power to the kitchen. Standing water and electrical outlets don’t mix well, so better safe than sorry. You don’t want to end up with an electrical shock while trying to stop the flood. If the water is near any outlets, it’s even more important to cut the power off immediately.
  • Avoid Slips and Falls: Kitchen floors can get really slippery when wet, and even more so when there’s water everywhere. Be careful while walking around. If you’re trying to navigate the flooded space, move slowly and steady yourself as you go.
  • Evacuate If Needed: If the flooding is severe and you feel like it’s compromising your safety, don’t hesitate to get out. In extreme cases, water can rise quickly, and it’s better to be cautious. Grab any family members or pets and head to higher ground.

2. Stop the Source of Water Causing the Kitchen Flood

Now that you’ve got safety covered, it’s time to stop the water from flowing. This may seem like an obvious step, but when panic sets in, it’s easy to forget.

  • Locate the Source of the Flooding: Is the water coming from an overflowing sink? A broken water line? Or did your dishwasher suddenly spring a leak? The faster you identify the cause, the quicker you can stop the flow. You might be able to turn off the water supply right at the appliance or under the sink, so take a minute to figure out where the problem is coming from.
  • Shut Off the Water Supply: If the source is a burst pipe or a faulty water line, find the main water valve to your home and turn it off. This will stop the water from flowing into your kitchen and prevent further flooding. If you can’t find the main valve, look under the sink or near the water heater for valves that control individual appliances.
  • Move Quickly, but Calmly: Every minute counts. Don’t let the situation overwhelm you—take quick, decisive action and focus on stopping the flow of water.

3. Remove Standing Water to Prevent Water Damage

to prevent water damage, remove standing water in flooded kitchen with mop

Once the source of the water is under control, it’s time to start cleaning up the mess. Here’s where you can minimize the damage:

  • Grab Your Wet/Dry Vacuum: If you have one, a wet/dry vacuum is a game-changer. It’ll suck up the water quickly, allowing you to clear the area faster and start drying things out. If you don’t have one, try using towels, mops, or a sponge to soak up the water.
  • Move Furniture and Appliances: The next thing to do is to clear the area of anything that might be damaged. Move smaller appliances like toasters, blenders, or mixers to a dry area. If water has reached your cabinets or anything underneath them, try to move them away from the water. The quicker you act, the more likely you’ll save your belongings.
  • Use Towels or Old Rags: Once the major flooding is under control, soak up any remaining water with towels or old rags. Make sure you dry every corner and crevice, especially in the areas near appliances or under cabinets where water can sit unnoticed.
  • Ventilate the Kitchen: Open the windows, turn on fans, or use a dehumidifier to help dry out the space. The longer the water stays, the more damage it can do. Getting the air moving will help prevent mold and mildew from setting in.
  • Read more: Water Damage Cleanup: What You Can Do (and When to Call in the Pros)

4. Assess the Damage

You’ve stopped the flood, and now it’s time to assess the situation. What kind of damage are you dealing with? Here’s how to check it:

  • Check the Cabinets: Water can seep into wooden cabinets, which can cause warping and structural damage. If you notice swelling or a soft feel, it’s time to call in a professional. Dry out the area as much as you can in the meantime.
  • Inspect Flooring and Walls: Water can quickly damage wood or laminate flooring. If your floors are soaked, you’ll want to remove any standing water and dry the area thoroughly. If water has soaked into the walls, it can lead to mold or structural issues. Check around baseboards and edges for water seepage.
  • Look for Moisture Behind Appliances: Sometimes, the water hides behind the refrigerator, stove, or dishwasher. Check these spots to see if moisture has collected in hidden areas.
  • Keep an Eye Out for Mold: Mold can start growing as quickly as 24 to 48 hours after a flood. Look for dark spots, a musty smell, or any visible signs of mold growth. If you catch it early, you might be able to prevent further spread.

5. Document Everything for Insurance

document kitchen flood and water damage for insurance

Now that you’ve managed the immediate issues, it’s time to prepare for the next step—insurance.

  • Take Photos and Videos: Document the damage in as much detail as possible. Make sure to take clear photos and videos of the flooded area, the damage to appliances, cabinets, and flooring. This will help your insurance provider assess the situation.
  • Keep a Record: Make a note of what’s damaged and the steps you’ve taken to mitigate the damage. This will help both your insurance claim and any professionals who come to help you.
  • Read more: Safety Guidelines: Reentering Your Flooded Home

What To Do If You Have Water Damage

If your kitchen has sustained water damage, taking quick and decisive action is essential. Once you’ve stopped the source and mitigated immediate risks, it’s time to focus on the next steps to restore your space.

  • Contact Restoration Professionals: Call a water damage restoration company, like Complete Flood Restoration, as soon as possible. Quick action is critical to minimize further damage and prevent issues like mold growth.
  • What to Expect During the Restoration Process:
    • Inspection and Assessment: Professionals will assess the extent of the damage, including hidden areas like under cabinets and behind appliances, to determine the best course of action.
    • Water Removal: Using industrial-grade equipment like pumps and vacuums, they’ll extract standing water quickly to prevent further damage.
    • Drying and Dehumidification: Specialized drying tools, such as air movers and dehumidifiers, will ensure all moisture is eliminated from floors, walls, and cabinetry.
    • Cleaning and Sanitizing: Restoration teams will clean and sanitize affected areas to prevent bacteria and odors, leaving your kitchen safe and hygienic.
    • Repair and Restoration: Finally, they’ll handle any necessary repairs to restore your kitchen to its pre-flood condition, whether it’s replacing flooring, fixing cabinetry, or repainting.
  • Prepare for Insurance Claims: Document the damage and keep receipts for any emergency expenses you incur. Restoration companies can often assist in providing detailed reports and working with your insurance adjuster to streamline the claims process.

Taking these steps will help you regain control and restore your kitchen efficiently with professional guidance.

How to Prevent A Kitchen Flood From Happening Again

Preventing future kitchen floods requires regular maintenance and some simple proactive steps. Here’s how to safeguard your kitchen from future disasters:

  • Inspect Plumbing Regularly: Check for signs of wear and tear on pipes, hoses, and seals under sinks and around appliances. Replace old or damaged components before they fail.
  • Upgrade Appliances: If your dishwasher or refrigerator is prone to leaks, consider upgrading to newer, more reliable models. Look for appliances with built-in leak detection or automatic shut-off features.
  • Use Water Alarms: Install water leak detectors under sinks and near appliances. These alarms can alert you to leaks early, giving you time to act before a flood occurs.
  • Maintain Drains: Keep kitchen drains clean and clear to prevent clogs that can lead to backups. Avoid pouring grease or food debris down the sink, as these are common culprits for blockages.
  • Monitor Water Pressure: High water pressure can stress plumbing lines and increase the likelihood of leaks. Use a pressure regulator if necessary to maintain safe levels.
  • Have a Shut-Off Plan: Know where your main water shut-off valve is located and practice turning it off. This knowledge can be invaluable in an emergency.
  • Regular Maintenance Checks: Schedule routine inspections with a plumber to catch small issues before they escalate into major problems.

By following these steps, you can minimize the risk of water damage and keep your kitchen safe and dry for years to come.

Stay Calm, Act Fast, and Let Us Help

Having a kitchen flood isn’t fun, but with the right steps, you can minimize the damage and get your home back to normal faster than you think. Remember, Complete Flood Restoration is just a phone call away. We’ve been serving homeowners in San Antonio for years, and we know how to handle floods like pros.

Whether it’s stopping the water flow, clearing out the mess, or handling the repair work, we’ve got you covered. If you’re ever in doubt or need help, don’t hesitate to reach out to us. Your kitchen will thank you!

Call Complete Flood Restoration today for expert water damage solutions. We’ll help you get your kitchen back in shape in no time!

how much does water damage restoration cost

How Much Does Water Damage Restoration Cost in San Antonio? Your Complete Guide

When you’re staring at a soggy carpet or a dripping ceiling, your first thought might be, “How much is this going to cost me?” It’s a fair question, and you’re not alone. Here at Complete Flood Restoration, we know how overwhelming water damage can be. That’s why we’ve broken down the costs and key factors so you’ll know exactly what to expect—no surprises, no guesswork.

Let’s dive into the details (pun absolutely intended).

The Bottom Line: How Much Does Water Damage Restoration Cost?

Water damage restoration costs in San Antonio typically range from $1,200 to $5,000, depending on factors like the type of water (clean, gray, or black), the extent of damage, and how fast you act.

Here’s a quick breakdown:

  • Clean water (e.g., from a broken pipe): $3–$4.25 per square foot.
  • Gray water (e.g., from a washing machine leak): $4.50–$6.50 per square foot.
  • Black water (e.g., sewage backup): $7–$7.50 per square foot.

For example:

  • A small leak in your bathroom could cost $450 to $1,500 to fix.
  • Flooded basement after a heavy storm? You’re looking at $8,000 to $15,000, depending on how much of the space is affected.
  • Widespread damage with black water contamination? Costs can climb to $20,000 or more due to extensive sanitization and replacement of materials.

What Affects the Cost of Water Damage Restoration?

The cost of restoration depends on several key factors, each of which can significantly influence your final bill.

1. The Types of Water Damage

water damage categories- clean water gray water black water

Not all water is created equal. Here’s how water type affects costs:

  • Clean Water: Typically from broken pipes or rain. It’s the easiest and least expensive to clean up since there are no contaminants.
  • Gray Water: Comes from appliances like dishwashers or washing machines. It contains mild contaminants, which increase the cleanup complexity and costs.
  • Black Water: The most hazardous type, often from sewage backups or floodwaters. It requires thorough sanitization, removal of all porous materials (like carpets and drywall), and additional precautions to protect your health.
  • Learn how to deal with each: Handling every category of water damage

Example: Cleaning up a 500-square-foot space:

  • Clean Water: $1,500–$2,100.
  • Gray Water: $2,250–$3,250.
  • Black Water: $3,750–$4,250.

2. The Extent of the Damage

The more water spreads, the more it damages. Here’s how it breaks down:

  • Minor Damage (Class 1): Small leaks affecting part of a room. Costs range from $150 to $500 for simple drying and minor repairs.
  • Moderate Damage (Class 2): Water spreads to an entire room, soaking walls and flooring. Expect $550 to $1,000 for cleanup and partial restoration.
  • Significant Damage (Class 3): Water saturates walls, ceilings, and floors, often requiring structural repairs. This can cost $1,500 to $3,200.
  • Extensive Damage (Class 4): Long-standing water that affects foundations, subfloors, and structural materials. Restoration costs range from $20,000 to $100,000.

3. The Materials Affected

Water doesn’t discriminate—it seeps into everything it touches. Here’s a breakdown of repair costs for common materials:

  • Carpet: $1–$11 per square foot to dry, but replacement may be required if contaminated by gray or black water.
  • Drywall: $1.50–$3 per square foot to replace.
  • Hardwood Floors: $10–$15 per square foot to repair or replace.
  • Ceilings: $325–$1,250 for drywall replacement and repainting.

Read more: Uncovering the Hidden Facts Behind Water Damage Costs in San Antonio

What About Hidden Costs?

Water damage isn’t just about what you see on the surface—it’s what’s lurking behind the walls and under the floors that can drive up costs. Here are a few hidden expenses to be aware of:

  • Mold Remediation: Mold can grow within 24–48 hours of water exposure. Expect costs of $2,000 to $4,000 for inspection and removal.
  • Electrical Repairs: Water-damaged outlets or wiring require professional repairs, costing $1,500 to $10,000 depending on the extent.
  • Structural Damage: Prolonged water exposure can compromise your home’s foundation or framing. Repairs can range from $2,000 to $15,000.

Does Insurance Cover Water Damage Restoration?

Dealing with insurance claims can feel like navigating a maze. Here’s the breakdown:

  • Typically Covered: Sudden water damage from burst pipes or roof leaks.
  • Not Covered: Gradual damage due to neglect or floods (unless you have flood insurance like FEMA’s Flood Insurance Program).

Pro Tip: Document the damage with photos and call us for a professional assessment. We work with your insurance provider to streamline the claims process.

Read more from our blog:

San Antonio’s Unique Water Challenges

Living in San Antonio has its perks, but water-related disasters aren’t one of them. From flash floods during storm season to burst pipes during unexpected winter freezes, we’ve seen it all. Older homes in neighborhoods like Terrell Hills are prone to plumbing leaks, while homes near low-lying areas face flood risks.

Why Choose Complete Flood Restoration?

At Complete Flood Restoration, we’re not just about fixing water damage—we’re about giving you peace of mind. Here’s why San Antonio homeowners trust us:

  • Local Experts: We know the unique challenges of Texas homes.
  • Rapid Response: Our team arrives within an hour—because every minute counts.
  • Certified Pros: We’re  IICRC certified,  so you can trust we’ll do the job right.
  • No Surprises: Clear pricing and honest communication every step of the way.

Tips to Save on Water Damage Restoration Costs

While you can’t always prevent water damage, you can take steps to minimize costs:

  1. Act Fast: The longer water sits, the worse (and costlier) the damage gets.
  2. Shut Off the Water: Locate your main shutoff valve to stop the flow.
  3. Protect Valuables: Move items like rugs, furniture, and electronics to dry areas.
  4. Call the Pros: The sooner we start the restoration process, the better your chances of saving materials.

FAQs: We’ve Got You Covered

How soon should I start water damage restoration?

Within 24–48 hours to prevent mold growth and structural issues.

What if I don’t see visible water damage?

Peeling paint, warped floors, and musty odors are telltale signs. Call us for an inspection if you suspect hidden damage.

Can I DIY the cleanup?

Small spills? Sure. But anything more extensive—especially gray or black water—requires professional-grade equipment and expertise.

Don’t Wait—Call Complete Flood Restoration Today

Water damage doesn’t just hurt your home—it can hurt your wallet too if left untreated. Understanding what water damage restoration costs to expect is the first step in making informed decisions for your property. At Complete Flood Restoration, we offer fast, reliable service and transparent pricing to help you recover quickly and affordably.

When disaster strikes, trust us to handle the mess so you can focus on getting back to normal. Call us today for a free consultation or schedule your service online. Your home—and your budget—deserve nothing less than the best.

Resources

storm preparedness for House in summer thunderstorm

When storms approach, the last thing any homeowner wants is unexpected damage and costly repairs. However, with a few proactive measures, you can prevent or minimize the impact of storms on your home. At Complete Flood Restoration, we’ve seen how even small efforts can make a big difference to reduce storm damage. Here are seven simple storm preparedness steps to protect your home, wallet, and peace of mind.

1. Seal Windows and Doors to Keep Water Out

Why It’s Important:

Unsealed windows and doors can allow water to seep in, damaging walls, floors, and furniture. Proper sealing to keep water out protects your home’s interior and structure.

How to Seal Windows and Doors:

  • Inspect for Gaps and Cracks: Look for any visible gaps around windows and doors. These can be sealed with weather-resistant caulk or weather-stripping.
  • Add Storm Shutters or Window Film: For homes in high-wind areas, adding storm shutters or applying window film can provide an extra layer of protection.

Bonus Tip: Consider hiring a professional to inspect your windows and doors for any weak spots to prevent water damage.

2. Trim Tree Branches and Clear Outdoor Items

Why It’s Important:

Overhanging branches and unsecured outdoor items can become dangerous projectiles in high winds, damaging your roof, windows, and even your car.

How to Trim and Clear Safely:

  • Trim Branches Near the House: Focus on branches that could fall on your roof or windows, and prune them regularly.
  • Secure Outdoor Furniture and Decor: Move any loose outdoor items like patio furniture, grills, or garden decor indoors or secure them properly.

Bonus Tip: Check with a professional arborist for trees that are especially close to your home.

3. Clean Gutters and Downspouts to Avoid Water Buildup

Why It’s Important:

Clogged gutters can lead to water pooling around your foundation, which may cause leaks, foundation shifts, or basement flooding. Cleaning them before storms can help water flow away from your home safely.

How to Clean Gutters Efficiently:

  • Remove Leaves and Debris: Use gloves and a gutter scoop to clear out any build-up in the gutters.
  • Direct Downspouts Away from Your Home: Make sure your downspouts lead water at least 5-10 feet away from your foundation to prevent water damage.

Bonus Tip: Install gutter guards to keep your gutters cleaner for longer, reducing the frequency of maintenance.

4. Inspect and Repair Your Roof for Potential Weak Points

Why It’s Important:

Your roof is your first line of defense against storms. Even minor damage can lead to leaks that affect your entire home. Regular roof checks and repairs are essential for storm preparedness.

How to Inspect Your Roof:

  • Check for Loose Shingles or Damaged Flashing: Look for signs of wear or damage, particularly around chimneys and vents.
  • Consider a Temporary Roof Cover: If you know your roof has weak points, consider installing a temporary cover for extra protection.

Bonus Tip: Regularly schedule a professional roof inspection, especially before storm season.

5. Elevate Valuables and Move Electronics to Higher Ground

Why It’s Important:

Flooding can be unpredictable, and even a small amount of water can ruin electronics, furniture, and valuable belongings. Moving these items to higher ground can prevent expensive replacements.

How to Protect Your Valuables:

  • Store Items on Upper Floors: Move electronics, important documents, and valuables to higher levels, like an upstairs room or on high shelves.
  • Use Waterproof Containers: Store essential documents and sentimental items in waterproof containers.

Bonus Tip: Make digital copies of important documents and back them up online for extra security.

6. Address Basement and Foundation Vulnerabilities

Why It’s Important:

Basements and foundations are highly susceptible to water damage. Even small cracks can lead to leaks, mold, and structural issues, which can be very costly to repair.

How to Fortify Your Foundation and Basement:

  • Seal Foundation Cracks: Use waterproof sealant on any visible cracks in your foundation.
  • Check Your Sump Pump: If you have a sump pump, test it regularly, and consider installing a battery backup to keep it running in case of a power outage.

Bonus Tip: Consider adding a French drain or other drainage solutions to divert water away from your foundation.

7. Prepare an Emergency Kit with Key Contacts and Supplies

Why It’s Important:

Being prepared for any emergency is crucial, especially when facing a storm. A well-stocked emergency kit ensures you and your family have essential supplies if you need to shelter in place or evacuate.

Your Storm Preparedness Emergency Kit:

  • Include Essentials:
    • Water: Pack at least one gallon of water per person per day, with a three-day supply as the minimum. If space allows, extra water for hygiene is also helpful.
    • Non-Perishable Food: Aim for easy-to-eat, shelf-stable items like canned goods, energy bars, dried fruits, nuts, and instant meals. Remember to include a manual can opener.
    • Flashlight and Batteries: A flashlight is essential for power outages, and extra batteries ensure you’ll have light for as long as you need it. Consider including headlamps to keep your hands free.
    • First-Aid Kit: A well-stocked first-aid kit with bandages, antiseptic wipes, tweezers, adhesive tape, pain relievers, and any personal medications is crucial for minor injuries.
    • Additional Supplies: Include personal hygiene items (like hand sanitizer, moist towelettes, and toilet paper), multi-purpose tools, emergency blankets, and a whistle to signal for help if needed.
  • List Important Contacts:
    • Emergency Contacts: Create a list of contacts, including local emergency numbers, nearby family members, and a designated out-of-town contact.
    • Insurance Information: Include your insurance policy numbers, agent contact details, and claim instructions. This will simplify the process if you need to file a claim quickly.
    • Complete Flood Restoration’s Contact Information: Having our number handy  (726-215-5244) allows you to reach out immediately for emergency services if storm damage occurs. Add any other local services, like utility companies, to the list as well.

Bonus Tip: Store your emergency kit in an accessible place and make sure everyone in the household knows where to find it.

Read more from Texas Ready about how to stay storm-safe. 

Take Steps Today to Protect Your Home

Storms can be unpredictable, but with a little storm preparedness effort, you can reduce storm damage and keep your home safe. From sealing windows to creating an emergency kit, each task helps you prepare for the unexpected. Remember, if you do experience storm damage, Complete Flood Restoration is just a call away. We’re here 24/7 to help you restore your home and get back to normal as quickly as possible.

By taking these storm preparedness precautions, you’re investing in your peace of mind and the safety of your property. Don’t wait for the next storm—start preparing today!

low water pressure gauge shows sign of damaged water line
damaged Water line Main Pipe Leaking causes low water pressure

We’ve all experienced that moment of dread when we see a sudden change in our home, like discolored water flowing from the faucet or water pressure dropping unexpectedly. As a homeowner in San Antonio, you know that damaged water lines can lead to costly repairs and extensive headaches if not addressed promptly. After 20 years in the flood damage restoration business, I can tell you that recognizing these signs early is crucial to protecting your home and your wallet.

So, let’s dive into the five urgent warnings of damaged water lines that you can’t afford to ignore. Trust me, your future self will thank you for it!

1. Discolored Water

If the water coming out of your taps looks brown or rusty, that’s a major red flag. Discolored water often indicates that your pipes are corroding, which can lead to significant health risks and potential plumbing disasters. Sometimes, this discoloration can occur due to municipal work, but if it’s persistent, it’s likely time to take action.

What to Do:

  • Test the Water: Fill a clear glass with water and observe it closely. If you see particles or a brown hue, it’s time to call a plumber.
  • Contact Local Authorities: Reach out to your local water supply company to inquire if any work is being done that could affect your water quality.

Don’t let discolored water become a costly issue down the line—take it seriously!

San Antonio Water System (SAWS) (.org) has a page dedicated to troubleshooting water quality concerns, you can check it out here. 

2. Low Water Pressure

Ever noticed that the water pressure in your shower seems to have taken a vacation? Low water pressure can be a sign of damaged water lines, particularly if there are pinhole leaks draining water away. It’s not just inconvenient; it can indicate that there’s a bigger problem lurking in your plumbing system.

What to Do:

  • Check Other Fixtures: Test water pressure in multiple areas of your home. If it’s consistently low across the board, you need to investigate further.
  • Consult a Professional: If you can’t find a simple fix, call in a plumber to assess your water lines. Ignoring this could lead to more serious damage and repairs.

Don’t let low water pressure ruin your daily routine. Act quickly to diagnose the issue!

Troubleshoot water pressure problems with SAWS.

3. Frequent Clogs

If you’re constantly dealing with clogs, it’s time to take a step back and consider the possibility of damaged water lines. Clogs may seem like a minor inconvenience, but frequent blockages can indicate deeper issues within your plumbing system, such as a collapsed or corroded pipe.

What to Do:

  • Assess the Situation: If you’re unclogging drains more often than you should, it’s a sign of trouble.
  • Try DIY Solutions: For minor clogs, use a plunger or a mixture of baking soda and vinegar. However, if clogs persist, don’t hesitate to call a professional plumber to investigate.

Frequent clogs are a warning sign—don’t ignore them!

4. Aging Pipes

Your home’s plumbing system doesn’t last forever. Over time, all types of pipes will show signs of wear and tear. If your home is older, it’s essential to know what kind of pipes you have and their typical lifespans. Ignoring aging pipes can lead to catastrophic leaks and costly repairs.

What to Do:

  • Know Your Pipes: Familiarize yourself with the materials used in your plumbing and their expected lifespans. For example, galvanized pipes typically last about 20 years, while copper can last up to 70 years.
  • Schedule Regular Inspections: Regular plumbing inspections can help identify potential problems before they escalate.

Stay ahead of the game and keep an eye on those aging pipes!

5. Moisture and Damp Spots

Seeing unexplained damp spots in your home? This is a major warning sign of a potential water leak due to damaged water lines. Not only does moisture create an uncomfortable living environment, but it can also lead to mold growth and other serious issues.

What to Do:

  • Locate the Source: Check for moisture around the affected areas. This might involve moving furniture or lifting carpets to see if the water is coming from a water line.
  • Contact Professionals: If you find damp spots, reach out to Complete Flood Restoration for a professional assessment. Quick action is vital to preventing further damage and mold growth.

Don’t let moisture ruin your home—act swiftly!

Solutions and Prevention Tips

Spotting the signs of damaged water lines is just the first step—taking action is what really counts! Here are some friendly tips and solutions to keep your plumbing in great shape and your home safe:

  • Discolored Water: If you notice your water looking a bit off, it’s important to test it right away. You can grab a water testing kit or reach out to your local water authority for help. If it doesn’t clear up, don’t hesitate to call a plumber. Better safe than sorry, right?
  • Low Water Pressure: Feeling like you’re waiting forever for the shower to warm up? Regularly check your water pressure by turning on faucets in different parts of the house. If it’s consistently low, it’s time to give a plumber a shout. They’ll get to the bottom of it and help restore that refreshing flow.
  • Frequent Clogs: Constantly dealing with clogs can be frustrating. Try using drain strainers to catch debris and avoid flushing anything that shouldn’t go down the toilet. Regular drain cleaning can help, too! If you find yourself unclogging too often, it might be time to call in a pro for a good look at what’s going on.
  • Aging Pipes: If your home is getting up there in years, your plumbing might need some extra TLC. Schedule regular check-ups with a plumber to catch any wear and tear before it turns into a bigger issue. It’s a small investment that can save you from major headaches down the road.
  • Moisture Issues: Spotting damp areas in your home? Don’t ignore them! Find the source of the moisture and tackle those leaks right away. If you’re not sure where to start, the team at Complete Flood Restoration is just a call away. We’re here to help you handle moisture issues effectively and keep mold at bay.

By staying on top of these tips and addressing any issues as they come up, you can protect your home from the headaches that come with damaged water lines. And remember, if you ever feel stuck or overwhelmed, don’t hesitate to reach out to us at Complete Flood Restoration. We’ve got your back and are ready to help you keep your home safe and sound!

Take Action Now: Protect Your Home from Water Line Issues—Contact Complete Flood Restoration Today!

If you recognize any of these urgent warnings of damaged water lines, don’t hesitate to reach out. Complete Flood Restoration is here to help you tackle any plumbing issues in San Antonio. Our experienced team understands the importance of acting quickly to prevent further damage and costly repairs.

Call us today to discuss how we can assist you with your water line issues. Your home and peace of mind are worth it!

Read more:

men moving boxes for emergency pack-up service

We’ve all been there—one minute you’re enjoying a quiet evening at home, and the next, a disaster strikes. Whether it’s a sudden flood, a burst pipe, or a fire, emergencies can turn your world upside down in an instant. Emergency pack-up services can save your belongings. We’ve been in the flood damage restoration business for over a decade and we can tell you that being prepared is half the battle.
You can read more from Ready (.gov) about being prepared for an emergency.

In this guide, we’re going to walk you through the top five situations where you’ll need emergency packout help. Understanding when to call for help can save you time, money, and a whole lot of stress. So, let’s roll up our sleeves and get into how you can protect your home and belongings when the unexpected happens!

1. Water Damage from Flooding

First up on our list is the big one: flooding. Whether it’s due to heavy rain or burst pipes flooding your basement, or a major toilet overflow in the bathroom, water can wreak havoc on your home and belongings in no time.

When floodwaters rise, the last thing you want is to be scrambling to protect your valuables. That’s where you’re going to need emergency packout. We can help you safely move your belongings to higher ground or secure them in a safe storage facility while we work on the restoration.

What You Should Do:

  • Act Fast: The sooner you call us, the better. Water can damage your stuff quickly, so don’t wait.
  • Let Us Handle It: With our team’s experience, we know how to pack up items to minimize damage. Trust us to take care of your belongings like they were our own.

If you find yourself facing rising waters, remember that our emergency pack-up services are designed for situations just like this. We’ve got your back!

2. Fire Damage

Next on the list is fire damage. Fires can happen in the blink of an eye, and when they do, the aftermath can be devastating. Whether it’s a kitchen mishap or an electrical issue, dealing with fire damage is no walk in the park.

In these situations, you’ll need emergency pack-up services to help salvage what you can. Our team will assist in packing up items that can be saved and transporting them to a secure location while we handle the fire damage restoration process.

Here’s What You Should Consider:

  • Stay Safe: Your safety comes first! If there’s a fire, get out and call 911. Once the smoke clears, call us for help with the recovery.
  • Quick Recovery: The sooner we can pack up and move your belongings, the more we can save from smoke and soot damage.

Don’t hesitate to reach out if a fire has left your home in disarray. We’re here to help you navigate this tough situation.

3. Mold Infestation

Moving on, let’s talk about mold infestations. In San Antonio’s humid climate, mold can develop quickly, especially if there’s been a water leak or flood. And trust me, you don’t want to mess around with mold!

If you discover mold in your home, it’s time to call in the pros. Emergency pack-up services can help you remove affected items and prevent mold spores from spreading throughout your home. We’ll work to contain the situation while we address the mold problem.

Action Steps:

  • Don’t Delay: The longer you wait, the worse it gets. Mold can lead to serious health issues, so take action immediately.
  • We Know What to Do: Our team will pack up your belongings safely and securely, so they won’t be contaminated during the cleanup.

If you’re facing a mold issue, remember that we’re just a phone call away. We’ll help you get through it and restore your home to a safe and healthy environment.

Read more: Red Flags for Mold: What a Musty Smell in Your San Antonio Home Could Mean

4. Severe Storms

In Texas, we know a thing or two about severe storms. Heavy winds, hail, and rain can cause significant damage to your property, leaving you in a tough spot. If a storm has damaged your roof or windows, it’s crucial to secure your belongings quickly.

That’s where our emergency packout services come in. We’ll help you pack and move your items to protect them from further damage while we assess the storm’s impact on your home.

What to Keep in Mind:

  • Be Prepared: If severe weather is on the horizon, have a plan in place. Know who to call and what steps to take if disaster strikes.
  • Swift Action: We can help you respond quickly, ensuring your belongings are safe from the elements.

Don’t wait until it’s too late. If storms have left your home vulnerable, reach out for our emergency pack-up services. We’re here to help you weather the storm!

5. Plumbing Failures

Last but not least, let’s talk about plumbing failures. Whether it’s a broken pipe, an overflowing toilet, or a faulty water heater, plumbing disasters can lead to significant water damage in your home.

When plumbing issues arise, you’ll need to act fast to minimize damage. Our emergency pack-up services are designed to help you protect your valuables while we address the water issue.

Key Considerations:

  • Don’t Panic: Plumbing problems can feel overwhelming, but we’ve seen it all. Take a deep breath and call us for help.
  • Prevent Further Damage: We’ll pack up your belongings to keep them safe while we resolve the plumbing issue.

When plumbing troubles hit, don’t hesitate to contact us for emergency pack-up services. We’ll help you navigate the situation and get your home back on track.

Be Prepared for Anything with Emergency PackOut Services

Life can throw some curveballs, but being prepared can make all the difference. When disaster strikes, knowing you have emergency pack-up services ready to roll gives you peace of mind. Whether it’s flood damage, fire, mold, severe storms, or plumbing failures, Complete Flood Restoration is here to help you pick up the pieces.

If you help storing those items as you weather through the process of restoring your home, we offer content storage services as well- and you can rest assured that your belongings are in good hands. 

So, if you ever find yourself in one of these situations, don’t hesitate—call us for emergency packout. We’ll ensure your belongings are safe and sound while we tackle the restoration. Remember, we’ve been serving the San Antonio community for years, and we’re ready to help you through whatever comes your way. 

Don’t wait for an emergency to hit—reach out today to learn more about our pack-up services! Together, we’ll protect your home and your peace of mind.

White Wall Affected with Mold in Room- does mold affect indoor air quality
Indoor damp & air quality (IAQ) testing look for mold

If you’ve noticed mold creeping into your home or just have a nagging concern about how it might be affecting your indoor air, let’s be clear: mold absolutely impacts your indoor air quality, and it’s not something to ignore. Whether it’s a faint musty smell or visible mold spots, these aren’t just minor annoyances—they’re warning signs.

You deserve to feel confident that your home is a healthy place for your family, and mold is a real threat to that. Understanding exactly how mold can undermine your air quality, and what you can do about it, is key to keeping your living space safe and comfortable. Let’s dive into what you need to know—and why dealing with mold right away is critical if you want to avoid costly damage and keep your home’s air safe for you and your family.

What is Mold, and How Does It Affect My Home?

Mold is a type of fungus that thrives in damp, humid environments. It spreads by producing tiny, lightweight spores that travel through the air. If these spores find a moist surface inside your home, they can begin to grow and reproduce. You’ll often find mold in places where moisture is common—like bathrooms, basements, kitchens, or anywhere there’s been a water leak or flooding.

Now, here’s the important part: those tiny spores can affect the air you breathe.

How Does Mold Impact Indoor Air Quality?

When mold is present indoors, it releases spores into the air. Even if the mold is hidden behind walls or under floors, the spores can still circulate throughout your home via air currents or your HVAC system. Once airborne, these spores can cause a variety of problems. Read more from the World Health Org about dampness and mould. 

For most people, mold exposure leads to mild irritation, like coughing or sneezing. However, if you’re sensitive to mold, have asthma, or other respiratory issues, mold can trigger more serious symptoms, including wheezing, shortness of breath, or even respiratory infections in severe cases.

What Are the Signs That Mold is Affecting My Indoor Air Quality?

If you’re concerned about mold, you’re probably wondering how to tell if it’s already affecting your home’s air quality. Here are some common signs to watch for:

  • Musty odors: A persistent, damp smell in certain areas of your home could indicate mold growth, even if you don’t see it.
  • Allergy-like symptoms: Frequent sneezing, coughing, or itchy eyes when you’re indoors may be caused by mold spores in the air.
  • Visible mold: If you see mold on walls, ceilings, or other surfaces, it’s likely that spores are also in the air.
  • Increased humidity: Mold thrives in moist environments, so if your home feels unusually humid, it’s worth checking for mold growth.

Read more: Red Flags for Mold: What a Musty Smell in Your San Antonio Home Could Mean

Where Does Mold Typically Grow Indoors?

Mold spores need three things to grow: moisture, warmth, and a food source (organic material, like wood, drywall, or fabric). Here are the most common places mold tends to grow in homes:

  • Bathrooms: The combination of steam from showers and poor ventilation creates the perfect environment for mold.
  • Basements: Basements are often damp and prone to water leaks or high humidity, making them prime real estate for mold.
  • Kitchens: Leaky sinks or dishwashers can lead to mold growth in cabinets, behind appliances, or in pantry areas.
  • Attics: Poor ventilation and roof leaks can lead to mold growth in your attic, especially in a climate like San Antonio’s, where heat and humidity are common.

Can Mold Affect My Health?

woman in pajamas sick in bed with tissues- mold affect indoor air quality

The health effects of mold depend on the type of mold and your level of exposure. For most people, mild symptoms like sneezing, runny nose, or throat irritation are common. However, individuals with asthma, allergies, or weakened immune systems may experience more severe reactions.

It’s also worth noting that some molds produce mycotoxins, which are toxic compounds that can cause more serious health problems. Black mold (Stachybotrys), for example, is known for producing mycotoxins that may lead to respiratory issues, fatigue, and even memory problems.

If you or someone in your home has been experiencing unexplained health issues, it’s a good idea to investigate whether mold might be the culprit.

How Can I Improve Indoor Air Quality If I Have Mold?

If you suspect mold is affecting your indoor air quality, taking action quickly is key. Here’s what you can do:

air conditioner with mold
Mold growing in an air conditioner can spread harmful spores throughout your home, affecting indoor air quality and your health. Keep your HVAC system clean to prevent mold.
  • Control moisture: Mold cannot grow without moisture, so fixing leaks and controlling humidity is essential. Aim to keep indoor humidity levels below 50%, especially in humid areas like San Antonio.
  • Ventilate properly: Use exhaust fans in bathrooms and kitchens, and ensure proper airflow throughout your home to prevent moisture buildup.
  • Use air purifiers: HEPA air purifiers can help reduce airborne mold spores, improving the air quality while you address the root problem.
  • Remove mold safely: Small mold problems can often be handled with DIY cleaning solutions, but for larger infestations, it’s best to call in a professional mold remediation service.

When Should I Call a Professional?

If you’ve found mold growing in multiple areas of your home, or if the problem seems to keep coming back despite your efforts to clean it, it’s time to call in a professional. Mold remediation experts can help:

  • Identify the source of moisture that’s causing the mold problem.
  • Safely remove the mold without spreading spores throughout your home.
  • Prevent future mold growth by recommending ventilation or humidity control solutions.

In a city like San Antonio, where humidity and rainstorms are common, professional mold remediation can give you peace of mind that your home is mold-free and your air quality is protected.

What Can I Do to Prevent Mold in the Future?

Prevention is the best defense against mold. Here are some proactive steps you can take to reduce the risk of mold spores affecting your indoor air quality:

  • Fix leaks promptly: Whether it’s a leaky roof or a dripping faucet, address water issues immediately to prevent moisture buildup.
  • Use dehumidifiers: If you live in a humid area (like San Antonio), a dehumidifier can help keep your home’s humidity levels in check, especially in basements and attics.
  • Clean regularly: Regularly cleaning areas prone to moisture, like bathrooms and kitchens, can help prevent mold from growing.
  • Check ventilation: Ensure that exhaust fans are venting outside, not just recirculating air indoors. This is especially important in bathrooms and kitchens.

Final Thoughts: Does Mold Affect Indoor Air Quality?

Yes, mold can absolutely affect your indoor air quality. From mild allergic reactions to more serious health risks, mold spores can lead to discomfort and even long-term health issues. If you’ve noticed a musty smell or other signs of mold in your home, addressing it sooner rather than later can protect both your health and your property. Taking simple steps to control moisture, improve ventilation, and address mold issues quickly will go a long way in maintaining a healthy indoor environment.

If you ever feel uncertain about handling mold on your own, don’t hesitate to reach out to a mold remediation professional to ensure your home stays mold-free and your air quality stays fresh.

Keep Reading: Don’t Let Mold Take Over: How to Master Mold Prevention After Water Damage

prevent laundry room water damage- washing machine and sink in stylish laundry room
woman surprised to see her Broken washing machine overflow

Your laundry room might not be the most glamorous part of your home, but when something goes wrong, it can suddenly feel like the center of your world. From piles of wet clothes to warped floors and soggy drywall, laundry room water damage can quickly turn into a nightmare. It’s a space we rely on constantly, yet we often overlook its maintenance—until disaster strikes.

Water damage can be costly, with repairs ranging from a few hundred dollars to several thousand, depending on the extent. But the good news? You can avoid many of these issues with a little foresight and preventive care. Let’s dive into how you can keep your laundry room dry and disaster-free.

The Top Culprits of Laundry Room Water Damage

Preventing pricey repairs starts with knowing how the problem happens in the first place.  Here are the usual suspects:

  • -Washing Machines

Causes: Overloading, unbalanced machines, clogged drain lines, overflowing during filling, and aging components can all lead to water damage.

Overflow Issue: If your washing machine overflows when filling, the water level sensor has malfunctioned, or the drain line is blocked. Regularly inspect your machine to ensure it’s functioning properly, and clear any blockages to prevent overflow-related flooding.

Bonus Tip: Consider upgrading to washing machines with built-in leak detection technology like an overflow sensor or automatic shutoff features to prevent overloading. Brands like GE Appliances and LG offer high-quality, water-efficient machines.

  1. -Leaking Hoses and Water Supply Lines

Causes: Corrosion, cracks, and general wear and tear over time can result in leaking hoses or faulty water supply lines.

Action Step: One of the easiest ways to protect against this is by installing steel-braided hoses. These are far more durable than traditional rubber hoses and are less likely to crack or burst. Don’t forget to check your connections every six months!

  1. -Poorly Maintained Sinks and Pipes

Causes: Loose connections, clogs, and corroding pipes are often overlooked but can cause significant water damage when neglected.

Pro Tip: DIY maintenance is easier than you might think! Regularly clean your sink’s drain with a simple mix of baking soda and vinegar, and ensure connections are tight and rust-free. Check out our detailed sink maintenance guide to avoid plumbing issues before they escalate.

  1. -Water Heaters (if it applies to your room setup)

Causes: Old anodes, cracked hoses, and rusted tanks can leak without warning, especially if your water heater is tucked away in the laundry room.

Advanced Tip: Set a regular maintenance schedule for your water heater. A simple annual checkup can extend the life of the unit and prevent leaks. Don’t forget to flush your tank to remove sediment buildup!

12 Proactive Steps to Avoid Laundry Room Water Damage

Washing machine leaking and woman cleaning with mop

1. Know Where Your Shutoff Valve Is—and How to Use It:  Don’t wait for an emergency to locate your water shutoff valve! Learn where it is and how to turn it off in case of leaks. Watch this quick video from San Antonio Water System for step-by-step instructions.

2. Inspect Hoses and Pipes Regularly:  Worn or cracked hoses are one of the most common sources of water damage. Replace rubber hoses with steel-braided hoses every 5 years, and check them regularly for signs of wear.

3. Use a Drain Pan with an Automatic Shutoff Feature:  A smart drain pan can detect leaks and shut off the water supply automatically, saving you from major water damage before you even notice something’s wrong.

4. Install Smart Water Sensors: Consider installing smart water leak detectors that alert you via phone if moisture is detected. Brands like Honeywell and Flume offer reliable options that can give you peace of mind (another great affiliate link opportunity!).

5. Upgrade to Water Leak-Proof Hoses: Leak-proof hoses are designed to withstand higher pressures and reduce the risk of cracks and bursts. They’re a bit more expensive upfront, but the longevity and security they provide are worth the investment.

6. Don’t Overload Your Washing Machine: Avoid stress on your washing machine’s components by not overloading it. Too much weight causes imbalances, which can lead to leaks or damage to surrounding fixtures.

7. Ensure Proper Washer Placement and Stability: An unbalanced washing machine can move during operation and damage nearby plumbing or walls. Make sure your washer is level and secure.

8. Clean Your Utility Sink’s Drain Regularly: A clogged utility sink can lead to overflow. Keep the drain clear with regular maintenance—use a drain snake or a simple vinegar and baking soda solution to keep it running smoothly.

9. Install a Water Heater Expansion Tank (If Applicable): If your water heater is in the laundry room, installing an expansion tank helps absorb excess pressure that could otherwise cause leaks or bursts.

10. Upgrade to a Washing Machine Pan with a Drain: A pan under your washing machine can contain small leaks and drain them away from your floors, preventing significant damage.

11. Consider Adding a Dehumidifier: Excess moisture in the laundry room can lead to mold and mildew over time. Adding a dehumidifier helps control humidity levels, especially in humid climates.

12. Be Present When Doing Laundry: It may seem simple, but staying home while doing laundry can prevent disasters. If something goes wrong, you can catch it early and stop a small leak from turning into a flood.

How to Identify Early Signs of Laundry Room Water Damage

Here’s a quick checklist to help you spot early signs of water damage:

We recommend inspecting your laundry room every 3 months for these warning signs to stay ahead of any issues.

FAQ

Washing machine repair technician. Washer service

How often should I replace my washer’s hoses?

It’s a good idea to replace your washer’s hoses every 5 years, even if they look fine. Opt for steel-braided hoses for added durability.

What’s the best way to clean a clogged sink drain?

Start with a mix of baking soda and vinegar, followed by hot water. For tougher clogs, a drain snake or a plunger works wonders.

What do you do if your laundry room is flooded?

First, turn off the water supply and electricity to the area. Use towels or a wet/dry vacuum to remove standing water, and contact a professional like Complete Flood Restoration for help.

Why are my laundry room walls wet?

Wet walls could indicate a hidden leak or excess humidity. Check for leaking hoses or pipes, and consider using a dehumidifier to reduce moisture levels.

How do I get moisture out of my laundry room?

A dehumidifier is your best friend. Also, ensure proper ventilation and fix any leaks or plumbing issues to keep moisture levels down.

Why is my laundry room floor wet?

A wet floor could be caused by a leaking washing machine, clogged sink, or faulty hoses. Inspect your hoses, pipes, and washing machine for leaks, and make sure your drain is clear.

Don’t Wait for a Laundry Room Disaster—Take Action Now

A little bit of maintenance can save you from a big, expensive mess. Regular inspections, smart upgrades, and staying proactive can make all the difference in preventing water damage. Don’t wait for disaster to strike—take action today to protect your laundry room.

Need a professional inspection or help with repairs? Contact Complete Flood Restoration now for expert advice and services that keep your home dry and damage-free!

how long does water damage restoration take

Water damage can strike unexpectedly, leaving you with questions about how long it will take to restore your home or business. Whether it’s a minor appliance leak, a burst pipe, or a severe flood, each water damage cleanup comes with unique challenges and timelines. At Complete Flood Restoration, we understand the urgency to restore your space quickly and safely. In this post, we’ll break down the different types of water damage cleanup, the steps involved in cleanup, and the estimated timelines for each.

Why Timeframes Vary for Water Damage Cleanup

Water damage cleanup isn’t one-size-fits-all. How long it takes to complete restoration depends on several factors:

Our team at Complete Flood Restoration uses specialized tools and processes tailored to each scenario to ensure thorough and efficient cleanup, so let’s dive into the different scenarios and their timelines.

 Cleanup Timelines for Common Water Damage Scenarios

Minor Appliance Leaks (e.g., Leaking Dishwasher or Washing Machine)

Estimated Timeline: 1–2 days

When an appliance leaks, it can release a surprising amount of water quickly. While this kind of damage might seem minor, ignoring it could lead to mold growth or damage to surrounding areas.

Process:

  1. Assessment and Extraction: Our team arrives within 30 minutes, assessing the affected area and extracting any standing water immediately.
  2. Drying and Dehumidification: With high-powered fans and dehumidifiers, we work to eliminate moisture from flooring and nearby walls.
  3. Inspection for Hidden Water: Even with minor leaks, water can seep under floors or behind walls. We use moisture meters to check for hidden water pockets and ensure complete drying.

Challenges: Minor appliance leaks are usually contained, but water can hide under flooring or within cabinetry, requiring careful inspection and drying.

Tips for Speeding Up the Process:

  • Turn off the appliance immediately.
  • Move surrounding items away from the leak area to help drying.
  • Contact professionals quickly to avoid extensive damage.

Burst Pipes and Plumbing Leaks

Estimated Timeline: 1–3 days, depending on damage extent and affected areas

A burst pipe can cause extensive water damage, particularly if it’s within walls or ceilings. Burst pipes are a leading cause of residential water damage, often resulting from freezing temperatures, old piping, or excessive water pressure.

Process:

  1. Water Shut-Off and Assessment: Once you shut off the main water supply, our team quickly assesses the affected area to prevent further spread.
  2. Water Extraction and Drying: We use industrial equipment to extract water from carpets, walls, and floors, followed by powerful drying equipment.
  3. Pipe Repair and Restoration: If necessary, we work with licensed plumbers to repair the damaged pipes, ensuring no further issues arise.
  4. Inspection for Long-Term Damage: After drying, we inspect for any signs of mold or weakened structure that could cause future issues.

Challenges: Burst pipes can flood large areas quickly, often behind walls or floors. Quick extraction and drying are crucial to prevent further damage.

Tips for Speeding Up the Process:

  • Regularly inspect and maintain your plumbing to prevent bursts.
  • Keep your home heated in winter to avoid frozen pipes.

Roof Leaks and Storm Damage

Estimated Timeline: 2–5 days, with additional time for structural repairs if needed

Roof leaks, often caused by severe storms or age-related wear, can lead to water infiltration through the ceiling and walls, resulting in mold and structural damage if untreated.

Process:

  1. Initial Assessment and Containment: Our team assesses the area and prevents further water entry by installing tarps if needed.
  2. Water Extraction and Drying: We remove water from affected areas and dry the structure using high-efficiency dehumidifiers and fans.
  3. Roof Repair and Restoration: Depending on the damage, we may recommend additional repairs to restore the roof and ensure no further leaks.
  4. Long-Term Mold Prevention: Since roof leaks can affect unseen areas, we perform thorough inspections to prevent potential mold growth.

Challenges: Roof leaks can impact multiple areas, from the attic to walls, increasing the risk of hidden water damage and mold growth.

Tips for Speeding Up the Process:

  • Address leaks immediately, even if they seem minor.
  • Schedule regular roof inspections, especially after severe weather, to catch potential issues early.

Sewage Backups and Contaminated Water

Estimated Timeline: 3–7 days, depending on contamination severity

Sewage backups are among the most complex and dangerous types of water damage, as they involve hazardous black water. In addition to structural damage, sewage backups pose serious health risks, requiring specialized handling and sanitation.

Process:

  1. Assessment and Safety Protocols: Our certified professionals use protective gear and specialized equipment to assess and contain the contaminated area.
  2. Sewage Extraction and Disposal: We safely extract contaminated water and dispose of hazardous materials following local regulations.
  3. Deep Cleaning and Sanitization: After removal, we thoroughly clean and disinfect the area to prevent bacterial and mold growth.
  4. Moisture Removal and Inspection: Finally, we dry and inspect the area to ensure no residual contamination remains, using antimicrobial treatments if necessary.

Challenges: Due to health risks, sewage cleanup requires a detailed process for sanitation and safe disposal, resulting in longer cleanup times.

Tips for Speeding Up the Process:

  • Avoid contact with contaminated water.
  • Seal off the affected area and call professionals immediately for safe cleanup.

Flood Damage and Extensive Basement Flooding

Estimated Timeline: 3–10 days, potentially longer for extensive flooding

Floods can cause widespread damage to both homes and businesses, impacting structural components, belongings, and essential systems like HVAC and electrical.

Process:

  1. Initial Pumping and Water Extraction: Our team uses industrial-grade pumps to quickly remove standing water, focusing on limiting damage.
  2. Drying and Dehumidification: We deploy powerful dryers and dehumidifiers to eliminate moisture and prevent mold.
  3. Item Removal and Content Restoration: Belongings are moved to secure storage, where we begin the process of content restoration.
  4. Structural Inspection and Mold Prevention: We inspect for structural damage, treating areas to prevent mold and further issues down the road.

Challenges: Floodwaters can saturate floors, walls, and belongings, requiring extensive drying and sanitation, especially in areas like basements prone to mold.

Tips for Speeding Up the Process:

  • Remove as many belongings as possible to prevent water damage.
  • Ensure proper grading around your home to direct water away from foundations.

Read more from IICRC: Eleven Essentials for Safe Flood Clean‐up

How Complete Flood Restoration Tackles Different Scenarios Efficiently

At Complete Flood Restoration, we understand that each water damage scenario requires a unique approach. Our team of IICRC-certified professionals uses advanced equipment like high-powered dryers, dehumidifiers, and specialized cleaning agents to handle even the most challenging cases. Our 30-minute response time and commitment to quality ensure that we tackle each job with efficiency and care.

We’re here to reassure you that, no matter the scenario, our team has the expertise and resources to restore your home or business.

Take the First Step Toward Quick, Safe Water Damage Restoration

Water damage cleanup can vary significantly in duration, from a single day for minor appliance leaks to over a week for extensive flood damage. By understanding the types of water damage and the restoration timelines, you can better prepare for what’s involved and know when to expect your space back to its original condition. At Complete Flood Restoration, we’re committed to restoring your home or business as quickly and efficiently as possible while ensuring a safe, thorough, and high-quality cleanup.

If you’re facing water damage, don’t wait—call us today! We’re available 24/7, ready to serve San Antonio and surrounding areas. With a 30-minute response time, industry-certified professionals, and a compassionate approach, we’re here to help you get your life back on track.

prevent basement flood
how to prevent basement floods

Are you confident that your basement is safe from the next heavy rain? Many homeowners in places like Cibolo, San Antonio, and New Braunfels think they’ve covered all their bases to prevent basement floods, yet they often overlook a crucial factor. This blog will reveal what flood prevention you might be missing and how to ensure your basement remains dry and protected.

The Dangers of Basement Flooding

Basement flooding isn’t just an inconvenience; it’s a significant threat to your home and health. The aftermath can be both financially and physically taxing. Let’s explore the key dangers associated with it.

Financial Impact

Flooding can leave a hefty dent in your finances. On average, a basement flood in areas like Cibolo or San Antonio can cost thousands in damages. This includes structural repairs, mold remediation, and replacing damaged belongings. Many insurance policies don’t cover flood damage, leaving you to foot the bill. A small leak today could become a financial disaster tomorrow if not handled promptly.

Health Risks

Beyond the visible damage, basement flooding can pose serious health risks. Stagnant water and damp conditions are breeding grounds for mold and mildew, which can lead to respiratory issues, allergies, and other health problems. Mold spores can spread throughout your house, affecting air quality and posing risks to everyone, especially children and those with pre-existing health conditions.

Property Value

Flooding doesn’t only impact your current living conditions; it can also affect your home’s resale value. Potential buyers in places like Alamo Heights or Kirby might shy away from properties with a history of water issues. Disclosures of past flooding can lower your home’s value, making it less attractive in a competitive market. Keeping your basement dry is not only about protecting your current lifestyle but also preserving your investment for the future.

Currently battling a flooded basement? Read this blog post to learn what to do.

Common Mistakes Homeowners Make to Prevent Basement Floods

Many homeowners believe they’re doing everything right, but there are several common pitfalls that can lead to a wet basement. Let’s explore these mistakes and how to avoid them.

Relying Only on Sump Pumps or Drainage Systems

Sump pumps are a popular solution for basement water issues, but relying solely on them can be a mistake. Pumps can fail due to power outages or mechanical issues, leaving your basement vulnerable during heavy rain. It’s essential to have a backup system in place, such as a battery-powered pump, to ensure continuous protection. Regular maintenance is also key—check your sump pump every few months to confirm it’s functioning properly.

Ignoring Cracks in the Foundation or Basement Walls

Even minor cracks in your basement walls or foundation can lead to significant water ingress. Over time, these cracks can widen, allowing more water to seep in during storms. Inspect your basement regularly for any signs of cracking and address them promptly. Epoxy injections or hydraulic cement can seal minor cracks, preventing further damage and keeping water out.

Overlooking Gutter and Downspout Maintenance

Gutters and downspouts play a critical role in directing water away from your home. When clogged or improperly maintained, they can cause water to pool around your foundation, increasing the risk of basement flooding. Clean your gutters at least twice a year and ensure downspouts extend several feet away from your house. Consider installing gutter guards to reduce debris buildup and improve water flow.

Not Grading the Yard Properly to Direct Water Away from the House

The landscape surrounding your home should slope away to direct water away from the foundation. Poor grading can cause water to flow back towards your house, seeping into the basement. Evaluate your yard’s grading and make adjustments if necessary. Adding soil around your foundation can help create a slope, while using plants and shrubs can help absorb excess water.

waterproofing foundation to prevent basement flooding

#1 Thing You’re Overlooking: Waterproofing the Foundation

Here’s the big reveal—the most overlooked step in preventing basement flooding is ensuring your foundation is thoroughly waterproofed. Many homeowners miss this critical measure, but it can make all the difference.

Why It’s Important

Waterproofing your foundation is crucial because it acts as the first line of defense against water intrusion. It stops water before it even enters your basement, reducing the risk of flooding. Without proper waterproofing, water can easily penetrate through porous surfaces, leaving your basement susceptible to leaks and damage.

Professional Insight

Experts agree that waterproofing is a game-changer. Studies show that homes with properly waterproofed foundations experience significantly fewer flooding incidents. Consulting with a professional can provide you with tailored solutions based on your home’s specific needs and location, like those in Leon Valley or Live Oak.

Signs You Need Waterproofing

Not sure if your foundation needs waterproofing? Look out for these signs:

  • Cracks in the walls or floor
  • Water Stains indicating previous leaks
  • Musty Odors suggesting mold or mildew
  • Recurring Minor Leaks even after rain has stopped

If you notice any of these, it’s time to consider waterproofing solutions to protect your home.

How to Address Basement Flooding: Waterproofing Solutions

Once you’ve identified the need for waterproofing, it’s important to explore your options. From DIY fixes to professional services, here are some effective solutions.

DIY Solutions

For minor issues, you can tackle waterproofing yourself. Applying waterproof coatings to basement walls can prevent moisture seepage. For cracks, use epoxy or polyurethane injections to seal them effectively. These DIY methods are cost-effective and can be done with basic tools and materials available at home improvement stores. Liquid rubber coatings like this or concrete and masonry waterproofer like this can be a good DIY options for your basement.

Professional Solutions

For more extensive waterproofing needs, professional services offer comprehensive solutions. Exterior waterproofing membranes can be applied to your foundation walls to block water entry. Installing French drains can also help channel water away from your home, preventing it from reaching your basement. Consulting with experts ensures that you receive the most effective and long-lasting results.

Cost vs. Benefits

Investing in waterproofing may seem costly upfront, but the benefits far outweigh the potential expenses of flood damage. While initial costs can range depending on the complexity of the job, it’s a valuable investment. Protecting your home from water damage preserves its structural integrity, safeguards your health, and maintains its market value.

Other Essential Tips to Complement Waterproofing

Waterproofing alone won’t keep your basement dry. Implement these additional tips to enhance your home’s protection against flooding.

Maintain Gutters and Downspouts

Regularly clean and maintain your gutters and downspouts to ensure they effectively direct water away from your foundation. Consider using gutter extensions to carry water further from your home, reducing the risk of pooling near your basement.

Install a Sump Pump Backup System

Ensure your sump pump continues to work during power outages by installing a backup system. Battery-powered backups provide peace of mind during heavy rain when power failures are common.

Read more: Sump Pump 101

Proper Landscaping

Landscaping plays a crucial role in managing water flow around your home. Grade your yard to slope away from your foundation and use plants, rocks, and mulch to absorb excess water. Permeable paving materials can also help reduce water runoff and improve drainage.

Act Now to Prevent Basement Flooding

Prevent basement flooding to safeguard your home and health. While a lot of homeowners focus on common solutions, waterproofing the foundation is the critical step that can truly protect your investment. Don’t wait for the next storm to wreak havoc on your basement—take action today and secure your sanctuary.

Got water pooling in your basement in Cibolo? Dealing with an appliance leak in the basement in your Live Oak home? Call Complete Flood Restoration today to get your basement safe and dry again. 

Home flooring showing signs of water damage on Hardwood floors

Signs of water damage on hardwood floors can often appear when you least expect them, turning your beautiful home into a costly repair project. One moment, your floors are shining bright; the next, they’re buckling and discolored. Early detection is crucial to avoid extensive repairs and save your wallet from a hefty hit.

Hardwood flooring is a favorite among homeowners in San Antonio for its timeless beauty and durability. However, as lovely as it is, water damage can turn your dream floors into a nightmare faster than you can say “flood.” It’s vital to be aware of those sneaky signs, as they can help you act quickly and prevent costly repairs down the road. So, let’s roll up our sleeves and dive into the world of hardwood floors, ensuring you can keep your home looking its best!

Recognizing the Red Flags: Common Signs of Water Damage on Hardwood Floors

When it comes to unwelcome water intrusion, recognizing it early can save you from seeing Signs of water damage on hardwood floors.

Here are some key red flags to watch for:

  • Dark Spots or Stains: Dark patches on ceilings, walls, or floors indicate moisture buildup and possible water seepage, which can lead to mold growth.
  • Warping or Buckling: Warping in floors, walls, or furniture signals excess moisture. If wood swells and bends, it could result in more extensive damage if not addressed promptly.
  • Increased Humidity or Musty Smell: A sudden rise in humidity or musty odors often points to hidden water damage, especially in specific areas where leaks or stagnant water may be present.
  • Peeling Paint or Wallpaper: Bubbling paint or peeling wallpaper suggests trapped moisture, possibly from a roof or plumbing leak that requires immediate attention.

Read more: Spot the Signs of Drywall Water Damage Like a Pro.

The Science of Wood Flooring: How Long Does It Take for Water to Damage Wood Floors?

Understanding how long it takes for water to damage your hardwood floors can be eye-opening. Water doesn’t wait for a convenient moment; it can start affecting your beautiful floors almost immediately.

floors being removed during water remediation

Timeframe for Visible Damage: Typically, you might start to see signs of water damage within just a few hours of exposure. However, the full extent of the damage may not be apparent until days or even weeks later, depending on several factors. This is why it’s crucial to act quickly if you notice any leaks or spills.

Factors Influencing Damage Speed:

  • Type of Wood: Different hardwoods react to moisture in various ways. Softer woods tend to absorb water more quickly and can show signs of damage sooner than harder woods.
  • Moisture Level: The amount of water present plays a significant role. A small spill may cause minimal damage, while extensive flooding can lead to rapid deterioration.

Stages of Damage:

  1. Initial Exposure: The wood begins to absorb moisture, and minor discoloration may occur.
  2. Visible Damage: After several hours to days, you may notice dark spots, swelling, or warping.
  3. Severe Damage: Left untreated for weeks, wood can develop serious structural issues, including mold growth and irreversible warping.

Humidity Levels: In a humid environment like San Antonio, wood floors are particularly vulnerable. High humidity can exacerbate water absorption, leading to quicker damage. Conversely, if the air is too dry, the wood may shrink and crack. Maintaining a balanced humidity level is vital to prolonging the life of your hardwood floors.

Learn more about managing indoor humidity levels from the EPA. 

Assessing the Damage: Key Indicators to Inspect

Once you’ve spotted signs of water damage, it’s time to assess how deep the problem runs—especially when it comes to your hardwood floors. Here’s how to conduct a thorough evaluation to keep your home safe:

  • Under Carpets: Water can sneak beneath rugs, so lift them up and check for dampness or discoloration on the hardwood below.
  • Near Baseboards: Moisture often collects around baseboards, so look for swelling or peeling paint that could indicate water intrusion.
  • Behind Furniture: Move furniture away from walls and floors to uncover hidden damage. You might find issues lurking behind couches or cabinets that are easy to miss.

Routine inspections can help you catch water damage early. We recommend checking your home at least once a season, or more frequently if you’ve had recent storms or plumbing work done. For more tips on disaster preparedness and home inspections, visit FEMA’s website.

Steps for a Thorough Inspection:

  1. Visual Examination: Examine your hardwood floors for warping, buckling, or discoloration around joints and seams. Pay attention to dark spots that may indicate underlying moisture.
  2. Feel for Moisture: Run your hand along the edges of the boards and visible cracks. If they feel damp or spongy, the water damage may be more extensive than it seems.
  3. Check for Odors: A musty smell signals potential mold growth. If you notice any unpleasant odors, investigate further for hidden moisture issues.
  4. Use a Moisture Meter: If you have one, a moisture meter accurately measures moisture levels in your wood floors, helping determine if they are excessively saturated and require immediate attention.
  5. Identify Affected Areas: Note all spots showing signs of water damage and areas where water may have pooled. This information will be crucial when consulting with restoration professionals.

Remember, acting swiftly can prevent more extensive damage and save you money in the long run!

Understanding Repair Costs: Wood Floor Water Damage Repair Cost

Now that you’ve assessed the damage to your hardwood floors, you may be feeling a mix of concern and urgency. The next step in your journey is understanding what it will take to restore your home and, more importantly, what it might cost you. It’s completely normal to feel anxious about repair expenses, especially when it comes to water damage, which can lead to significant financial implications if not addressed promptly.

Average Repair Costs for Water Damage

When it comes to water damage repair costs, the figures can vary widely based on several factors. On average, homeowners might expect to pay anywhere from $1,000 to $5,000 for repairs, but this can increase depending on the extent of the damage. For example, minor repairs may cost around $500, while extensive damage requiring full replacement of hardwood floors can run upwards of $10,000.

Factors Influencing Repair Costs

Signs of water damage on hardwood floors with water stains

Several factors play a role in determining the final cost of repairs:

  • Extent of Damage: The more severe the damage, the higher the repair costs. If your floors are warped and require replacement rather than just repair, you’ll face a steeper bill.
  • Type of Repair Needed: Different repair methods come with varying price tags. Simple fixes like refinishing might be less expensive than replacing entire sections of flooring.

Read more: Hidden Water Damage Costs in San Antonio.

DIY vs. Professional Repair Costs

  • DIY Repairs: Tackling repairs on your own can save you money upfront, but beware—if the damage is extensive, you might end up spending more in the long run. Equipment rentals and materials add up quickly, and without the proper expertise, you risk making the situation worse.
  • Professional Repairs: Hiring professionals ensures that the job is done right the first time, but this comes at a price. While you may pay more initially, professional repairs often save you from costly mistakes and future repairs.

Tips for Budgeting and Potential Hidden Costs

  • Get Multiple Quotes: Reach out to several contractors to compare pricing and services. This gives you a clearer picture of what to expect.
  • Plan for the Unexpected: Water damage can sometimes hide other issues. Set aside a contingency budget (around 10-15% of your total repair budget) for unforeseen costs that may arise during the repair process.
  • Understand Your Insurance: Check with your homeowner’s insurance policy to see what water damage coverage you have. Knowing this in advance can help alleviate some financial stress.

Next Steps: Take Control of Your Home’s Health

Remember that being proactive is your best defense. Addressing potential issues early can save you from costly repairs and significant stress down the line. With a little vigilance, you can protect your beautiful hardwood floors and maintain the comfort of your home.

  1. Conduct a Thorough Inspection: Use the checklist we provided to assess your hardwood floors regularly. Look for any signs of damage, and don’t forget to check hidden areas.
  2. Take Action Immediately: If you notice any red flags—like dark spots or warping—don’t wait. The sooner you act, the less damage you’ll face.
  3. Consult with Professionals: If you find concerning signs or if the damage seems extensive, reach out to experts. We at Complete Flood Restoration are ready to provide you with an assessment and guide you through the repair process.

By staying vigilant and acting swiftly, you can protect your home and enjoy peace of mind. If you suspect water damage in your hardwood floors, don’t hesitate to contact us at Complete Flood Restoration. Our team of IICRC certified professionals is dedicated to helping you restore your home efficiently and effectively. Call us today for a free consultation and take the first step toward safeguarding your investment!

For real-life examples of how we’ve handled similar situations, check out our Recent Projects.Or read more from our blog: Water Damage Cleanup: What You Can Do (and When to Call in the Pros).

water damage Emergency plan or Disaster Preparedness on the desk.

When was the last time you thought about your water damage emergency plan? If it’s been a while, you’re not alone! Many homeowners in San Antonio don’t realize how important it is to keep these plans fresh and up to date. Water damage can sneak up on you like an unexpected rain shower during a sunny day, and having a solid emergency plan can mean the difference between a minor inconvenience and a major disaster.

At Complete Flood Restoration, we know that life happens—pipes burst, storms hit, and flooding can turn your cozy haven into a chaotic mess. So, let’s talk about how you can be prepared, what to include in your emergency plan, and how we can help if disaster strikes.

Understanding Water Damage Risks

First, let’s get real about what can cause water damage in your home. We often think of catastrophic floods, but many times, it’s those sneaky little leaks from broken pipes or malfunctioning appliances that catch us off guard. In fact, broken pipes and sewage backups are some of the most common culprits of water damage. They can create serious issues if not addressed promptly.

Pro Tip: Regularly check your home for vulnerabilities! Areas like basements, bathrooms, and even attics can be susceptible to water damage. It’s worth taking a few minutes each season to inspect for cracks, leaks, or any signs of moisture.

Assessing Your Current Water Damage Emergency Plan

Now, let’s talk about your emergency plan. Does it exist? When was the last time you updated it? Here are a few key components to consider:

Key Components of Your Emergency Plan

water damage emergency plan escape route
  • Emergency Contacts: Have a list of emergency contacts handy. This should include local services like Complete Flood Restoration, your insurance company, and a trusted plumber.
  • Escape Routes: Identify your emergency exits and make sure everyone in your household knows them. If you need to get out quickly, you don’t want to waste precious seconds figuring out which way to go!
  • Safe Meeting Point: Designate a safe meeting point outside your home where everyone can regroup after an emergency.

Checklist for Evaluating Your Plan

  • Is your contact information up to date?
  • Have you communicated your plan with your family?
  • Are your emergency supplies (like flashlights and first aid kits) accessible?

Regularly reviewing and practicing your emergency plan can help everyone feel more prepared and less anxious if an emergency arises.

Essential Tips for Updating Your Water Damage Emergency Plan

So, how do you ensure your water damage emergency plan is up to date? Here are some essential tips:

1. Review and Update Contact Information

Make sure all your emergency contacts are current. If you haven’t called us at Complete Flood Restoration lately, you might want to save our number now—726-215-5246.

2. Conduct a Home Assessment

Take a walk through your home and check for potential risks. Look for any signs of water damage or wear and tear. Remember, it’s always better to address a small issue before it turns into a big problem!

3. Invest in Technology

Consider adding some smart home devices to your arsenal. Leak detectors and automatic shut-off valves can be lifesavers, helping you catch issues before they escalate.

4. Create a Detailed Inventory of Your Possessions

Document your valuables for insurance claims. It might sound tedious, but trust us—when disaster strikes, you’ll be grateful you did this.

5. Educate Your Family

Make sure everyone knows their role in the emergency plan. Practice makes perfect, so why not run a few drills? Just think of it as a family bonding exercise with a touch of seriousness.

6. Local Resources for Emergency Preparedness

Being prepared is easier when you have the right resources. Here are some local options for you to consider:

local resource for emergency preparedness hardware store
  • Local Hardware Stores: Stores like Home Depot or Ace Hardware in San Antonio offer a variety of emergency supplies, from sump pumps to waterproof storage bins. Stocking up on essential items can make a huge difference when disaster strikes.
  • Community Organizations: Look into local groups such as the San Antonio Red Cross or neighborhood associations that may offer resources or workshops on emergency preparedness. They often provide valuable information and support to help you and your community stay safe.

7. Budgeting for Preparedness

Preparing for water damage doesn’t have to break the bank. Here’s how to budget effectively:

  • Assess Your Needs: Start by identifying which supplies or upgrades will best protect your home. This might include purchasing a sump pump or waterproofing your basement.
  • Create a Savings Plan: Set aside a small amount each month to build up your emergency fund. Even $10 to $20 a month can add up quickly and help you feel ready for any situation.
  • Cost-Effective Upgrades: When it comes to renovations, look for simple, cost-effective improvements, such as sealing windows and doors to prevent water intrusion. Regular maintenance, like cleaning gutters and downspouts, can also save you from larger, more expensive repairs down the road.

By taking these proactive steps, you can strengthen your water damage emergency plan, ensuring you’re ready for whatever nature throws your way.

How Complete Flood Restoration Can Help

water damaged floors and walls in house. dehumidifier pointing at walls.

We’re not just here to help when things go wrong; we want to prevent those disasters from happening in the first place. Here’s what we offer:

  • Emergency Water Extraction: We’re available 24/7 to respond to water emergencies. Our team is equipped with the right tools to tackle the toughest jobs.
  • Expert Restoration Services: From cleaning up after a flood to addressing hidden leaks, we can restore your home to its original condition.
  • Free Estimates and Thermal Imaging Services: We can detect moisture that’s not visible to the naked eye, helping us address issues before they become major problems.

Explore More:

Stay Prepared and Protect Your Home from Water Damage Emergencies

Water damage emergencies are stressful, but being prepared can make all the difference. Take some time to review your water damage emergency plan and make updates where needed.

Remember, Complete Flood Restoration is here to support you every step of the way. If you have questions or need assistance, don’t hesitate to reach out. Let’s keep your home safe together!

For more tips on dealing with water emergencies, check out our related blog posts:

Stay safe, San Antonio! We’ve got your back when nature or life decides to throw a curveball your way.

Other Resources

family on carpet- water damage when to repair and when to replace

Water damage might not be the first thing you think about when it comes to home maintenance, but it can quickly turn into a nightmare for homeowners and property managers. Carpet water damage is a hidden problem that not only affects the look of your home but can also lead to serious issues if ignored.

From minor spills to major leaks, understanding how carpet water damage impacts your home is key to protecting it. When left unchecked, water damage doesn’t just leave unsightly stains—it can weaken your flooring and encourage mold growth. The longer water sits, the worse the damage becomes, making it important to act fast.

Recognizing the signs of carpet water damage and knowing when to repair or replace your carpet can save you time, money, and the hassle of future problems.

In this guide, we’ll cover:

  • The signs of carpet water damage,
  • When you can repair the damage and when replacement is necessary, and
  • The health risks of mold in carpets due to water damage.

By the end, you’ll be equipped to make informed decisions and keep your home safe and healthy.

Signs of Carpet Water Damage

Discoloration and Stains

signs of carpet water damage

One of the most obvious signs of carpet water damage is discoloration. Water stains typically appear as dark patches that spread across the carpet. These stains show that water has seeped into the carpet fibers.

  • Stains can vary in size and shape.
  • Over time, if untreated, they may become more noticeable.

Discoloration isn’t just a cosmetic issue—it can signal deeper problems. Water-stained carpet can harbor bacteria and allergens, which pose hygiene risks. If stains persist after cleaning, it may be time to get a professional assessment to evaluate the damage.

Bad Odors

A persistent musty odor is another sign of water damage. When water gets into the carpet, it creates the perfect environment for mold and mildew, which leads to unpleasant smells.

  • This odor can spread throughout your home, affecting indoor air quality.
  • Ignoring the smell can lead to health issues, especially for those with allergies or respiratory conditions.

If the odor remains after cleaning, it may indicate that the water damage is deep-rooted, and more serious action is needed.

Dampness and Moisture

If your carpet feels damp to the touch or doesn’t dry within a reasonable time, it’s a clear sign of water damage.

  • Prolonged dampness weakens the carpet fibers and padding. This can eventually lead to structural issues with your flooring.

Moisture trapped in carpets also encourages mold growth, which poses health risks and further damages your home’s structure. Address dampness as soon as possible to prevent lasting damage and ensure your living space is safe.

Mold in Carpet from Water Damage

Unseen Threats Beneath the Surface

mold in carpet from water damage

Mold in carpets caused by water damage is more than just a nuisance—it’s a serious health hazard. Mold spores spread quickly, lowering indoor air quality and triggering allergy symptoms like sneezing, coughing, and eye irritation. For people with asthma or weakened immune systems, mold exposure can lead to severe respiratory issues.

What makes mold even more dangerous is that it often grows beneath the surface of the carpet, making it hard to detect at first. Regular inspections and promptly addressing any signs of water damage can help prevent mold growth and keep your home safe.

Health Risks of Mold in Carpets

Living with moldy carpets can lead to long-term health issues. Besides respiratory problems, mold exposure can cause skin irritation, headaches, and fatigue. Children and pets are especially vulnerable, which is why it’s important to take preventive steps to avoid mold.

Mold is also a sign that water damage has been a persistent issue, which could mean there’s more unseen damage in your home’s structure. A professional inspection and thorough remediation are recommended to ensure all mold is removed and any hidden moisture problems are addressed.

 For more information on safely dealing with mold, check out the EPA’s guide to mold cleanup in your home.

When You Can Repair Water-Damaged Carpets

Minor Damage Scenarios

Not all water damage means your carpet needs to be replaced. If the damage is small, like a spill or minor leak, you might be able to save your carpet. The key is to act quickly—removing excess water and drying the area as soon as possible will prevent further damage and mold growth.

Using fans, dehumidifiers, and absorbent towels can help dry out minor water damage. However, it’s important to make sure the carpet is thoroughly dried to prevent any lingering moisture that could cause problems later.

Read more: Damaged by Water? Learn How to Dry Your Home Like a Pro

DIY Methods and Professional Services

If you enjoy tackling things yourself, there are several ways to handle minor water damage:

  • Steam cleaning and using carpet-safe disinfectants can kill bacteria and stop mold from forming.
  • Always ensure good ventilation to help speed up the drying process.

However, for more extensive damage or if you’re unsure about the severity, it’s wise to hire professional help. Companies like Complete Flood Restoration use advanced equipment to dry carpets thoroughly and address any underlying issues. Their expertise ensures your carpets are restored safely and effectively.

When You Should Replace Water-Damaged Carpet

Beyond Repair Indicators

Sometimes, water damage is too severe to fix. If your carpet has been submerged or exposed to contaminated water (such as sewage or floodwater), it’s often best to replace it. In these cases, the carpet’s integrity is compromised, and it poses significant health risks.

drying carpet water damage

Water exposure over time also weakens carpet fibers and padding, making them less effective. If your carpet is fraying or has a compromised backing, replacement is the safest option.

Mold Concerns and Long-Term Exposure

If mold is present in the carpet, you need to act fast. Mold growth means the water damage has been there for a while, potentially spreading contamination. In these cases, the only solution is to remove and replace the carpet to ensure safety.

Long-term water exposure can also cause carpets to absorb contaminants that are hard to fully remove. Replacing the carpet eliminates these risks and restores both the look and function of your flooring.

Safety and Health Considerations

Your safety should always come first when dealing with water-damaged carpets. Carpets soaked in contaminated water or with visible mold are hazardous to your health. Replacing them is essential to keeping your living space safe and free from harmful pathogens.

Replacing damaged carpets also improves indoor air quality and creates a healthier home environment. Plus, it’s a chance to choose materials that are more resistant to water and mold, offering peace of mind for the future.

Conclusion

Deciding whether to repair or replace water-damaged carpets is critical to protecting your home’s safety, health, and appearance. Minor damage can often be handled with DIY methods or professional services, but severe damage, especially when mold is involved, requires prompt replacement to protect your household’s well-being.

If you’re unsure of how to handle your carpet water damage, consult Complete Flood Restoration for a professional assessment. Their expertise in water damage restoration will ensure that your home receives the care it needs, giving you peace of mind knowing your living space is safe and comfortable.

drywall water damage repair

Water damage doesn’t just look unsightly—it can pose significant risks to your home’s structure and your health. Drywall, a staple in most homes, is particularly susceptible to water, making it crucial to address damage swiftly. Ignoring signs of water damage can lead to structural issues, mold growth, and expensive repairs. In this guide, we’ll explore how to identify drywall water damage, understand its stages, and determine when replacement is necessary. Let’s equip you with the knowledge to protect your home and make informed decisions.

How to Determine Drywall Water Damage

Signs of Water Damage in Drywall

signs of water damage in drywall

Spotting early signs of water damage can save you a lot of trouble. Keep an eye out for discoloration—brown or yellow stains often indicate water has permeated your walls or ceiling. Soft spots are another telltale sign; press gently on suspected areas to see if they feel spongy. Additionally, peeling paint or wallpaper suggests underlying moisture issues, as does a musty odor, which could signify hidden water damage and potential mold growth.

Water stains on your drywall are often the result of a hidden leak, such as one coming from your ceiling. Learn more about the possible causes and solutions for ceiling leaks in our post: Water Leaking From Your Ceiling? Causes and Solutions.

Physical Tests

Don’t rely solely on visual cues. Conduct simple physical tests to confirm your suspicions. Press on discolored or suspicious areas to check for softness or dampness. If the drywall feels spongy or unusually soft, it’s a strong indicator of underlying water damage. Additionally, gently tap on the affected areas; a hollow sound could suggest that the drywall has become hollowed out due to water damage. These tests will give you a clearer picture of whether your drywall is compromised and requires immediate attention.

Stages of Drywall Water Damage

Early Stage

In the early stage, you might notice minor discoloration or slight dampness. Quick action, like using fans or dehumidifiers, can prevent further damage. Addressing issues at this stage is crucial to avoid escalation.

Moderate Stage

At this point, you may encounter soft spots, peeling paint, or warped drywall. While these issues are more severe, they might still be salvageable with thorough drying and assessment. Take swift action to evaluate the extent of the damage and repair what you can to prevent progression.

Advanced Stage

Severe softening, visible mold, and structural damage are hallmarks of advanced water damage. At this stage, replacement is often necessary due to compromised integrity and health risks. Mold growth, in particular, poses a serious threat to indoor air quality and health, especially for individuals with respiratory conditions.

Does Wet Drywall Always Need to Be Changed?

When It Can Be Saved

finishing drywall walls

If water exposure is limited and addressed quickly, you can often save your drywall. Use fans or dehumidifiers to dry out the area thoroughly. Monitor the condition closely and ensure no lingering dampness remains. Make sure to check hidden areas for moisture as well, as water can seep into cracks or cavities.

When It Must Be Replaced

In cases of prolonged exposure, significant softening, or visible mold, replacement becomes imperative. Even if the drywall appears dry on the surface, internal damage can persist, which is why professional evaluation is crucial. Don’t take chances with your safety and the structural integrity of your home. For a deeper understanding of mold prevention and cleanup, the EPA’s Mold Cleanup Guidelines are a valuable resource to help you understand the health risks and how to deal with mold properly.

What Happens If Water-Damaged Drywall Is Ignored?

water-damaged drywall with mold

Mold Growth

Untreated drywall can become a breeding ground for mold. Mold not only damages your property but can also cause serious health concerns, including allergies and respiratory problems. It’s vital to address any signs of mold promptly to safeguard both your home and your health. Exposure to mold can lead to coughing, sneezing, and more severe reactions in individuals with asthma.

Musty odors are often an early sign of hidden mold growth in water-damaged drywall. If you’ve noticed a persistent smell, you may want to learn more about the potential dangers in our post: Red Flags for Mold: What a Musty Smell in Your San Antonio Home Could Mean.

Structural Issues

Severe water damage can compromise the structure of walls and ceilings, leading to costly repairs down the road. Ignoring such issues can result in weakened structures that threaten the safety of your home. Be proactive in addressing these problems to prevent further damage and expenses. Warped or buckled drywall often indicates more profound structural issues behind the walls.

Health Risks

Mold in water-damaged drywall poses significant health hazards:

  • Allergies: Mold can trigger allergic reactions, such as sneezing, runny nose, and itchy eyes.
  • Respiratory issues: Exposure to mold can worsen asthma symptoms or cause other respiratory problems.
  • Compromised immune system: Mold can weaken the immune system, making you more susceptible to infections.
  • Chronic health problems: In some cases, prolonged mold exposure can lead to chronic health issues like sinus infections or headaches.

When to Call a Professional

While some minor repairs, like drying out small areas, can be handled independently, there are times when professional help is necessary. If you encounter mold, advanced damage, or hidden water leaks, it’s time to call in the experts. Complete Flood Restoration offers services to ensure thorough evaluation and remediation, providing peace of mind. Professionals can help you determine the extent of the damage and whether full or partial replacement is necessary.

Conclusion

Drywall water damage is a serious issue that requires prompt and informed action. By identifying and addressing damage early, you can prevent costly repairs and ensure the safety of your home. Don’t wait for the damage to worsen—act fast and consult professionals like Complete Flood Restoration for a comprehensive inspection and consultation.

Protect your home and health today and enjoy peace of mind knowing your drywall is safe and sound. Consider reaching out to professionals for a thorough inspection and solutions tailored to your needs. The longer you wait, the more damage can occur—so take action now!

toilet overflowing water damage emergency- repair man

There’s nothing quite like the panic that grips you when your toilet overflowing or a water damage emergency strikes. Water spills over the edge of the bowl, threatening to turn your bathroom into a small lake. It’s a situation no homeowner wants to face, yet it’s more common than we’d like to admit. But don’t worry—Complete Flood Restoration is here to guide you through this messy ordeal. With a few simple steps, you can contain the situation and prevent water damage from wreaking havoc in your home.

Immediate Action Steps: How to Stop the Overflow Quickly

When faced with an overflowing toilet, time is of the essence. Taking swift action can save you from the nightmare of a flooded bathroom. The good news is, it’s easier than you might think!

toilet shut off valve

Don’t Panic – Find the Shutoff Valve

First things first, stay calm. Panicking won’t help, but finding the shutoff valve will. Typically located behind the toilet near the floor, this valve is your best friend in stopping the flow of water.

  • Step 1: Locate the toilet’s water shutoff valve.
  • Step 2: Turn it clockwise to stop the flow of water.

If the valve is stuck, don’t worry. Simply lift the float inside the toilet tank to prevent more water from entering the bowl. This quick fix can buy you some time to address the root cause of the overflow.

Clear the Area and Remove Excess Water

mop in bathroom

Once you’ve halted the flow, it’s time to tackle the water that’s already escaped. Grab some towels, rags, or a mop and start soaking up the standing water. Be cautious around electrical outlets or cords that may have been exposed to water, as safety should always come first.

By quickly removing excess water, you can prevent it from seeping into other areas and causing further damage. Remember, prompt action is the key to minimizing the impact of an overflowing toilet.

Plunge Away – Safely and Effectively

hand holding plunger

Now that the immediate crisis is under control, it’s time to address the clog causing the overflow. Grab a plunger and get to work.

  • Step 4: Use a plunger to try and clear the clog.

For the best results, make sure there’s enough water in the bowl for the plunger to form a proper seal. With a bit of elbow grease and patience, you’ll likely be able to dislodge the blockage and restore your toilet’s normal function.

What Causes a Toilet Overflow and How to Prevent It

Understanding the common causes of toilet overflows can help you prevent future mishaps. Let’s take a closer look at what might be causing your toilet to act up and explore some practical prevention tips.

Common Culprits

Toilet overflows are often the result of clogged pipes, excess toilet paper, or foreign objects finding their way into the plumbing. It’s easy to inadvertently flush things that shouldn’t be there, like wipes, hygiene products, or even toys. These items can create blockages that lead to an unexpected overflow.

Prevention Tips

To keep your toilet flowing smoothly, consider adopting some preventative measures. Limiting paper use, avoiding flushing non-flushable items, and performing regular maintenance checks can go a long way in preventing clogs. Taking these proactive steps can save you from the headache of dealing with an overflowing toilet.

When to Call in the Professionals

While many toilet overflows can be resolved with DIY methods, there are times when it’s best to call in the experts. Let’s explore situations where a professional touch is necessary and how Complete Flood Restoration can be your go-to solution.

Read more: Water Damage Cleanup Guide

Beyond the Basics

Sometimes, a toilet overflow may be a symptom of a larger plumbing or sewage issue. In such cases, trying to fix it yourself could exacerbate the problem. If you’ve tried the basic steps and the overflow persists, it’s time to bring in the professionals.

How Complete Flood Restoration Can Help

At Complete Flood Restoration, we specialize in flood cleanup, water damage mitigation, and plumbing solutions. Our experienced team is dedicated to serving you with the highest level of care and expertise. If you’re dealing with a stubborn overflow, we’re here to help you get back to normal.

Real Stories from Our Customers: How We’ve Made a Difference

We’ve had the privilege of helping many homeowners navigate stressful situations, like an overflowing toilet. Here are a few real-life experiences that highlight the dedication and care we bring to every job.

  • Paola’s Late-Night Emergency

When Paola’s toilet overflowed in the middle of the night, she wasn’t sure who to turn to. “Thank God Alex and his crew were able to come out and take care of the situation,” she says. Our team acted fast to clean up the mess and restore her home, leaving her both relieved and grateful.

  • Rosalinda’s Health Concerns

After a major toilet overflow, Rosalinda was worried not just about the damage but about the potential health risks. She recalls, “Sammy and his crew worked throughout the night to clean up the mess and were incredibly professional every step of the way.” Our thorough approach ensured her home was safe and restored quickly.

  • Jose’s Two-Story Crisis

Jose faced a nightmare when his two-story house was flooded by an overflowing toilet. “From start to finish, Alex Rodriguez and the team at CFR provided exceptional service,” he says. Thanks to our expertise and attention to detail, Jose’s home was restored to its original condition, giving him peace of mind.

Water Damage After Toilet Overflowing: What to Watch For

Even after the immediate overflow is addressed, water damage can pose a lingering threat. Here’s what you should watch for and how Complete Flood Restoration can assist.

What’s at Risk

water damage emergency after toilet overflowing

Water from an overflowing toilet can damage floors, baseboards, and even cause mold if left untreated. Soft or warped floors, water stains, and musty odors are telltale signs of water damage that need prompt attention.

Read more from the Red Cross on water damage risks.

Key Signs of a Water Damage Emergency

If you notice any of these signs, it’s crucial to take action. Don’t wait for the damage to worsen—contact a professional team like Complete Flood Restoration to inspect the damage and start the drying process immediately. We can help you prevent long-term issues and restore your home to its pre-loss condition.

Final Thoughts Don’t Wait – Take Action Now

When it comes to overflowing toilets, acting quickly is the key to preventing serious water damage. By following the steps outlined in this guide, you can address the immediate problem and minimize its impact. Remember, Complete Flood Restoration is here to support you every step of the way.

If you’re facing an overflowing toilet or any water damage emergency, don’t hesitate to reach out to us. Our team is available 24/7 to provide fast, reliable service. Book a service with us today and take the first step toward restoring your home to its former glory.

commercial water damage in flooded office

You arrive at your office early one morning, ready to start the day, only to be greeted by an ominous sound—water dripping. A pool of water is spreading across the floor, trickling down the walls, and soaking everything in its path. Whether it’s caused by a burst pipe, a leaky roof, or a malfunctioning appliance, commercial water damage is a business owner’s worst nightmare. It can happen in any type of business, from office buildings to retail stores, leaving behind a trail of destruction that disrupts operations and impacts your bottom line.

Commercial water damage is more common than you might think, which is why it’s crucial to understand the potential sources of water damage, the risks involved, and how to protect your business. By being informed and prepared, you can minimize downtime, reduce repair costs, and ensure that your business recovers quickly.

Common Sources of Commercial Water Damage

flooded commercial building

Water damage in commercial buildings can stem from various sources. Here’s a look at some of the most common culprits:

Plumbing Failures: Broken pipes, faulty fixtures, and sewage backups are among the leading causes of water damage. A burst pipe can release hundreds of gallons of water in just a few hours, flooding entire sections of a building and causing extensive damage.

Roof Leaks: Poor maintenance, storm damage, and aging materials can lead to leaks in the roof. Over time, even a small leak can lead to significant water damage, compromising the structural integrity of the building.

HVAC System Issues: HVAC systems are vital for maintaining a comfortable environment, but they can also be a source of property damage. Clogged drains, leaking ducts, and condensation buildup can lead to water seeping into walls, floors, and ceilings.

Appliance Malfunctions: Commercial kitchens and laundries rely on appliances like water heaters, dishwashers, and washing machines. When these appliances malfunction, they can cause significant water damage, particularly if the problem goes unnoticed for a long time.

Natural Disasters: Flooding from heavy rains, hurricanes, and other severe weather conditions is a major cause of water damage. In areas prone to these types of events, businesses must be particularly vigilant and have a robust disaster preparedness plan in place.

How Water Damage Can Negatively Impact a Business

The impact of water damage on a business can be far-reaching, affecting not just the physical space but also the company’s operations, finances, and reputation.

Financial Losses: Water damage can lead to direct costs, such as repairs and replacement of damaged goods, as well as indirect costs like loss of revenue due to business interruption. Depending on the severity of the damage, the financial toll can be devastating.

Health Risks: Water damage often leads to mold growth, which can compromise indoor air quality and pose health risks to employees and customers. Mold exposure can cause respiratory issues, allergies, and other health problems, leading to potential liability issues for the business.

Structural Damage: Long-term exposure to water can weaken the structure of a commercial building, leading to deterioration of walls, floors, and ceilings. Over time, this can result in costly repairs and, in severe cases, make the building unsafe for occupancy.

Legal and Liability Issues: If a business fails to address water damage promptly, it could face lawsuits from tenants, customers, or employees. Proper maintenance and timely repairs are essential to avoid legal complications and protect the business’s reputation.

5. Who is Responsible for Water Damage in a Leased Commercial Property?

fingers pointing at each other- who is responsible for commercial water damage

Determining responsibility for water damage in a leased commercial property can be complex. Here’s a general overview:

Landlord vs. Tenant Responsibilities: Typically, the lease agreement will outline who is responsible for repairs in the event of water damage. In most cases, the landlord is responsible for structural repairs, while the tenant is responsible for damages to their property and any improvements they’ve made to the space.

Insurance Considerations: Both landlords and tenants should have insurance that covers water damage. Landlords typically carry commercial property insurance, which covers damage to the building, while tenants may need commercial renters insurance to cover their own losses.

Read these blog post on Raizner Law Blog for more information:

Answering Common Questions

Does Commercial Renters Insurance Cover Water Damage?
Yes, commercial renters insurance generally covers water damage to the tenant’s property, but it’s important to check the specific terms of the policy. Not all types of water damage may be covered, particularly if the damage results from negligence.

How Does Insurance Work for Water Damage?
Insurance coverage for water damage typically involves assessing the cause of the damage, determining responsibility, and filing a claim. Both landlords and tenants should understand their policies and know how to document damage for a claim.

What is Property Damage Commercial Insurance?
Property damage commercial insurance is a policy that covers damage to the building itself. This can include water damage, fire, vandalism, and other perils. Landlords typically carry this insurance to protect their investment.

Is Water Damage Considered Structural?
Water damage can be considered structural if it affects the building’s foundation, walls, or other critical components. Structural damage is usually more severe and costly to repair, and it may also pose safety hazards.

Importance of Adequate Insurance Coverage

Having adequate insurance coverage is essential for protecting your business from the financial fallout of water damage. Here’s what you need to know:

Understanding Your Policy: Review your insurance policy carefully to understand what is and isn’t covered. Look for key elements related to water damage, such as coverage limits, exclusions, and deductibles.

Preventative Measures: Taking steps to prevent water damage can not only protect your property but also reduce your insurance premiums. Regular maintenance, prompt repairs, and disaster preparedness are all important.

Resource: For more information, visit the Texas commercial property insurance guide.

Conclusion

Commercial water damage is a serious issue that requires prompt attention and careful planning. By understanding the risks, taking preventative measures, and ensuring you have the right insurance coverage, you can protect your business from the worst consequences. If you ever find yourself dealing with water damage, don’t hesitate to contact Complete Flood Restoration. We’re here to help you navigate the process and get your business back on track as quickly as possible.

flooded basement

Flooded Basement? Don’t Panic- Here’s What to Do in 9 Easy Steps

Coming downstairs to find a flooded basement is enough to make anyone’s heart race. Even the handiest DIYer dreads coming downstairs to 4 inches of water on the floor, and its only rising.

At a loss? Complete Restoration is on your side. We’re here to guide you through the steps you need to take when your basement floods. We’ll go over why you’re dealing with a basement flood in the first place, and equip you with some helpful tips to prevent this nightmare from happening in the future. Let’s take a look.

9 Steps To Take when your basement floods

1. Find the Source of Water

Before you do anything else, identify where the water is coming from. Is it a broken pipe, a leak in your foundation, or rainwater seeping in from outside? Knowing the source of the water is crucial because it will determine your next steps. If it’s a plumbing issue, shutting off the water supply might be necessary. If it’s rainwater, you may need to address drainage issues outside.

2.Cut off power to basement

Your safety is the top priority. Water and electricity are a dangerous combination, so you’ll want to cut off the power to your basement immediately. Head to your breaker box and switch off the circuit that powers your basement. If you’re unsure how to do this or if the breaker box is in a flooded area, call an electrician for help.

3. Take Care- safety precautions

Before you step into the flooded area, take necessary safety precautions. Wear protective gear like rubber boots and gloves to keep yourself safe from harmful bacteria, chemicals, or sharp objects that might be lurking in the water. Floodwater can be contaminated, so avoiding direct contact as much as possible is crucial. If the flood is due to a sewage backup, consider wearing a mask to protect yourself from harmful fumes.

4. pump out the water

Now it’s time to start removing the water. Depending on the amount of water, you can use a sump pump, wet vacuum, or even a mop and bucket for smaller amounts. The faster you get the water out, the less damage it will cause. If the flooding is severe, don’t hesitate to call in professionals who have the right equipment to handle large volumes of water quickly and efficiently.

5. Air Flow is the Way to Go

Once the water is out, it’s essential to dry out the space to prevent mold growth. Open windows and doors if possible to create cross-ventilation. Use fans and dehumidifiers to circulate air and reduce moisture levels. This step is critical because even a small amount of leftover moisture can lead to mold and mildew, which can cause health issues and further damage your property.

6. Get the Wet Stuff Out

Anything that got wet during the flood—like carpets, furniture, and boxes—needs to be removed from the basement as soon as possible. The longer these items stay wet, the more likely they are to develop mold or become permanently damaged. If you can, take these items outside to dry in the sun or bring them to an area with good ventilation. For items that can’t be salvaged, dispose of them properly to avoid further contamination.

7. Call Insurance Company

Once the immediate danger has passed, it’s time to call your insurance company. Report the flood and start the claims process right away. Take detailed pictures and videos of the damage before you move anything, as this documentation will be crucial for your claim. Be prepared to provide your insurance company with as much information as possible, including when the flood occurred, the source of the water, and the extent of the damage.

Pro Tip: Take pictures of the damage before moving anything!

8. Call in for back up

You don’t have to handle this alone. Depending on the severity of the flood, you may need to call in professionals to help with the cleanup and repairs. Consider contacting a water damage restoration company (like Complete Flood Restoration!) to handle the water extraction and drying process. You might also need a mold inspector to ensure your home is safe from mold growth, an electrician to check for electrical issues, and a plumber to repair any broken pipes or plumbing issues.

9. Clean the basement

Once it’s safe, the final step is to clean up. Start by removing any remaining debris and then thoroughly disinfect the entire area. This will help prevent mold and mildew from taking hold and ensure that your basement is safe to use again. Use a strong disinfectant on all surfaces, including walls, floors, and any furniture that came into contact with the floodwater. This step is crucial in restoring your basement to its pre-flood condition and preventing any lingering health risks.

Most Common Causes of a Basement Flood

Basement floods can be a homeowner’s worst nightmare, and they often seem to come out of nowhere. Whether it’s pouring rain or a clear day, a flooded basement can catch you off guard.

Wet Weather: Heavy Rain, Snowmelt, & Groundwater

heavy rains can cause a flooded basement

One of the most common reasons for basement flooding is wet weather. During heavy rains, your home’s drainage system might be overwhelmed, leading to water seeping into your basement. Here’s how it happens:

  • Heavy Rainfall: When the ground around your home becomes saturated with rainwater, it can no longer absorb more water. This excess water can then seep through cracks in your foundation or walls, leading to a flood in your basement. Poorly maintained gutters and downspouts that are clogged or improperly directed can exacerbate the problem, causing water to pool around your foundation.
  • Snowmelt: In colder climates, the thawing of snow and ice can lead to basement floods. As the snow melts, the water needs to go somewhere, and if the ground is still frozen or already saturated, that water could end up in your basement. A rapid thaw, combined with rain, can quickly overwhelm drainage systems, leading to significant flooding.
  • Rising Groundwater: In some areas, a high water table can be a constant threat. After prolonged periods of rain or in areas with poor drainage, groundwater levels can rise. When the groundwater reaches the level of your basement floor, it can push through cracks in your foundation, causing a flood. This type of flooding can be particularly challenging to control, as it’s related to the natural water levels in the ground.

Dry Weather: Plumbing Issues, Foundation Cracks, and Faulty Appliances

Surprisingly, basement floods can also happen during dry weather. Here’s what might cause a flood when the skies are clear:

  • Plumbing Issues: A burst pipe, faulty water heater, or broken washing machine hose can release a significant amount of water into your basement. These types of floods can happen suddenly and cause extensive damage if not addressed quickly. Regular maintenance and inspections of your home’s plumbing system are essential to prevent these issues.
  • Foundation Cracks: Even in dry weather, cracks in your foundation can allow water to seep into your basement. Over time, natural settling of your home or poor construction can lead to these cracks. While they might seem minor at first, they can become pathways for water when it rains or if there’s a high water table in your area.
  • Faulty Appliances: Water-based appliances, such as washing machines, dishwashers, and water heaters, are common culprits of basement floods. A malfunctioning appliance can release water into your home, leading to a flood. Regularly inspecting and maintaining these appliances can help prevent such disasters.
  • Sump Pump Failure: A sump pump is your basement’s first line of defense against flooding. If your sump pump fails due to a power outage, mechanical issue, or overwhelming water volume, your basement could quickly fill with water. It’s crucial to regularly test your sump pump and consider having a backup power source, such as a battery-operated pump, in case of emergencies.

How to Keep Your Basement Dry: Flooding Prevention Tips

Keep your basement dry and your peace of mind intact with these tips:

  • Check Hoses and Faucets: Regularly inspect your washing machine, water heater, and other appliances for leaks.

Clean Gutters and Downspouts: Ensure they’re free of debris and directing water away from your home’s foundation.

Trim Trees: Overhanging branches can damage your roof or block gutters, leading to water buildup.

Inspect for Leaks, Mold, and Cracks: Check around toilets, sinks, and appliances.

Monitor Water Pressure: High water pressure can strain pipes and cause leaks.

Watch Your Water Bill: An unexpected spike could indicate a hidden leak.

Know How to Shut Off Your Main Water Supply: Quick action can prevent a small leak from becoming a big disaster.

Inspect Your Roof and Chimney: Look for damage that could let water in.

Install Water Alarms: Get notified at the first sign of trouble.

Update Drainage Systems: Ensure proper drainage around your home.

Install a Sump Pump: A must-have for homes prone to flooding. Read more in our blog post here.

Replace Old Pipes: Aging pipes are more likely to fail.

Install a Water Leak Detection System: Early detection can save you a lot of headaches.

Update Windows and Doors: Make sure they’re properly sealed.

Seal Your Basement: Waterproofing your basement walls and floors is a solid investment.

Replace Washing Machine Supply Hoses: Consider upgrading to steel-braided hoses for added durability.

Leave Flood Cleanup to the Pros: How Complete Restoration Can Help

man repairs burst water pipe

When disaster strikes, Complete Restoration is here to take the weight off your shoulders. Here’s how we handle a basement flood:

  • We Ask the Right Questions: We assess the scope of the damage and your specific needs.
  • Thorough Inspection and Assessment: We identify the extent of water damage, ensuring no issue goes unnoticed.
  • Water Extraction and Removal: We use specialized equipment to remove water quickly and efficiently.
  • Damaged Material Removal: We safely dispose of anything that can’t be salvaged.
  • Clean, Sanitize, and Freshen Up: We make sure your basement is not only dry but also clean and free of any lingering odors.
  • Drying: We use high-powered fans and dehumidifiers to thoroughly dry the area.
  • Repair and Construction: We restore your basement to its pre-flood condition, making it better than ever.

FAQ

– How to Clean Concrete Basement Flood

Start by removing any standing water with a pump or wet vacuum. Once the water is cleared, clean and disinfect the area to prevent mold growth.

– How do I prevent basement flooding during heavy rain?

Ensure your gutters and downspouts are clean and direct water away from your foundation. Consider installing a sump pump and sealing cracks in your basement walls.

-What’s the best way to dry out a flooded basement?

Use fans and dehumidifiers to circulate air and reduce moisture levels. Removing any wet materials, like carpets or furniture, will speed up the drying process.

-Is it safe to live in a house with a flooded basement?

A lot of people wonder- can a flooded basement make you sick? or is it safe to stay in a flooded house? Short answer: No. Flood water can create put mold in the air you breathe and cause structural damage, neither of which may be obvious right away. Your best bet is to address the flood immediately and stay somewhere else temporarily. You can read more from the EPA- Flood Cleanup to Protect Indoor Air and Your Health.

-What does flooded basement clean up cost?

It’s hard to give a quick answer to that, because it really varies- like how much water we’re talking about, the extent of the damage, and the size of your basement, to name only a few. Basement flood cleanup jobs can range from a simple DIY mop up & fix to a major water damage remediation project. Regardless, we’re committed to helping you find the most affordable option and working with your insurance company along the way.

Who You Gonna Call? Complete Restoration!

Dealing with a flooded basement can be overwhelming, but you don’t have to face it alone. Complete Restoration is here to help every step of the way. Call us today at 726-215-5245, and let’s get your basement—and your peace of mind—back to normal.

plumber installing sump pump

​​When it comes to protecting your home from flood damage, a sump pump is one of the most critical tools you can have. For homeowners in San Antonio, where heavy rains and flash floods are a common occurrence, having a reliable sump pump can make the difference between a dry, safe basement and costly water damage. In this post, we’ll dive into everything you need to know about sump pumps, why they are essential for San Antonio residents, and how they can benefit your home.

What is a Sump Pump?

It’s a specialized device designed to remove excess water that accumulates in a sump basin, typically located in the lowest part of your home, such as the basement or crawl space. This pump works by detecting rising water levels and automatically pumping the water out of your home, usually directing it to a nearby drainage area, storm sewer, or a dry well.

How Does a Sump Pump Work?

These devices are activated by a float switch, which rises with the water level in the sump basin. Once the water reaches a certain level, the switch triggers the pump to start working. The pump then pushes the water through a discharge pipe and away from your home, ensuring that your basement or crawl space stays dry. Sump pumps are typically powered by electricity, though some models come with battery backups to ensure operation during power outages.

Types of Sump Pumps

There are two main types:

  1. Submersible Sump Pumps: These pumps are installed inside the sump basin and are completely submerged in water when operating. They are quieter and more efficient at removing large volumes of water, making them ideal for homes that are prone to frequent flooding.
  2. Pedestal Sump Pumps: These pumps have a motor that sits above the sump basin, making them easier to service but also louder during operation. They are a good option for homes with smaller sump basins or where space is limited.

Why Sump Pumps Are Essential for San Antonio Homeowners

flooded basement without sump pump

San Antonio is no stranger to heavy rainfall and flash floods, especially during the spring and early summer months. The city’s geography and climate make it particularly vulnerable to sudden, intense storms that can quickly overwhelm drainage systems and lead to flooding. For this reason, having a water removal system installed is not just a convenience—it’s a necessity.

Protect Your Home from Flood Damage

The primary benefit of a sump pump is its ability to protect your home from water damage. Flooding can cause extensive damage to your foundation, walls, flooring, and belongings. Water intrusion can also lead to the growth of mold and mildew, which can have serious health implications and be difficult to eradicate. By having a reliable flood prevention device, you can significantly reduce the risk of flood damage and the associated costs of repairs and mold remediation.

For more tips on how to protect your home from flooding, check out FEMA’s guide to flood preparedness.

Avoid Costly Repairs

Flood damage is one of the most expensive home repairs a homeowner can face. In addition to repairing structural damage, you may also have to replace damaged furniture, electronics, and other personal items. Furthermore, water damage can decrease the value of your home, making it harder to sell in the future. A sump pump acts as a first line of defense, helping to keep your home dry and reducing the likelihood of costly repairs.

Improve Indoor Air Quality

Standing water in your basement or crawl space can lead to high humidity levels and the growth of mold and mildew. These fungi release spores into the air, which can spread throughout your home and cause respiratory issues, allergies, and other health problems. A sump pump helps maintain a dry environment, which in turn improves the air quality in your home and creates a healthier living space.

Increase Property Value

Homes with a reliable sump pump system are more attractive to potential buyers, especially in areas prone to flooding like San Antonio. Prospective buyers will appreciate the added protection against water damage, which can make your home stand out in a competitive real estate market. By installing a sump pump, you not only protect your investment but also potentially increase the value of your property.

Additional Benefits of Sump Pumps

Beyond the obvious advantages of flood prevention, sump pumps offer several other benefits that make them a worthwhile investment for San Antonio homeowners.

Prevent Sewer Backups

Heavy rains can overwhelm the city’s sewer system, leading to backups that can flood your basement with raw sewage. This type of flooding is not only disgusting but also poses serious health risks. A sump pump can help prevent sewer backups by quickly removing excess water before it has a chance to enter your home.

Protect Your Home’s Foundation

Excess water around your home’s foundation can cause soil to shift and expand, leading to cracks and structural damage. Over time, this can compromise the integrity of your foundation and lead to costly repairs. A sump pump helps by directing water away from your home, reducing the pressure on your foundation and helping to keep it stable.

Reduce the Risk of Electrical Fires

Water and electricity don’t mix. If your basement floods and water comes into contact with electrical outlets, appliances, or wiring, it can create a dangerous situation that could lead to electrical fires. By keeping your basement dry, a sump pump reduces the risk of such hazards.

Maintenance Tips for Your Sump Pump

Like any other appliance, your sump pump requires regular maintenance to ensure it operates effectively when you need it most. Here are some tips to keep your sump pump in top condition:

Test Your Sump Pump Regularly

It’s important to test your sump pump at least once a year to make sure it’s working properly. To test it, slowly pour water into the sump basin and watch to see if the float switch activates the pump. If the pump doesn’t turn on, you may need to have it serviced or replaced.

Clean the Sump Basin

Over time, dirt, debris, and sediment can accumulate in the sump basin, which can clog the pump and reduce its efficiency. Be sure to clean out the basin regularly to keep your pump functioning properly.

Check the Discharge Line

The discharge line is responsible for carrying water away from your home, so it’s essential to make sure it’s clear of obstructions. Check the line regularly for clogs, kinks, or damage, and ensure that it’s directing water to an appropriate drainage area.

Install a Battery Backup

Power outages are common during severe storms, which is precisely when you need your sump pump the most. To ensure your pump continues to operate even when the power goes out, consider installing a battery backup system. This backup will keep your pump running for several hours, giving you peace of mind during a storm.

Schedule Professional Inspections

While DIY maintenance is important, it’s also a good idea to have your sump pump professionally inspected once a year. A professional can check for any signs of wear and tear, perform necessary repairs, and ensure that your pump is in optimal working condition.

Don’t Wait Until It’s Too Late

For San Antonio homeowners, installing a sump pump is one of the best investments you can make in protecting your home from flood damage. With the city’s unpredictable weather and frequent heavy rains, having a reliable sump pump can save you from costly repairs, improve your indoor air quality, and even increase your property value.

At Complete Flood Restoration, we understand the importance of safeguarding your home against water damage. Our team of experts is here to help you choose the right sump pump for your needs and ensure it’s installed correctly. Don’t wait until the next big storm to protect your home—contact us today to learn more about our sump pump installation and maintenance services.

man tries to identify what category of water damage

Water damage is one of the most common issues homeowners face, and in San Antonio, the risk is amplified by the region’s unique climate and geography. From sudden flash floods to the relentless Texas heat that can wear down plumbing systems, San Antonio homes are susceptible to various types of water damage. Understanding these risks and knowing how to manage them can save you time, money, and stress. This guide breaks down each category of water damage, highlights common causes in San Antonio, and offers practical advice on managing each type effectively.

Why You Want to Know the Category of Water Damage

Water damage is not a one-size-fits-all problem. It falls into three distinct categories: clean water, gray water, and black water. Each category requires a specific approach to ensure safe and effective restoration. For San Antonio homeowners, understanding these categories is especially important because the local environment can exacerbate water damage risks.

In San Antonio, high humidity levels, occasional heavy rains, and older homes with outdated plumbing systems are just a few factors that can contribute to water damage. Knowing how to identify the type of water damage you’re dealing with allows you to take appropriate action quickly, preventing minor issues from turning into costly repairs. Moreover, it ensures that you’re taking the right steps to protect your health and the structural integrity of your home.

Common Causes of Water Damage in San Antonio

San Antonio’s unique climate and aging infrastructure make it particularly vulnerable to water damage. Here are some common causes you might encounter:

  • Flash Floods: San Antonio is prone to sudden, intense storms that can lead to flash floods, overwhelming drainage systems and causing water to infiltrate homes.
  • High Humidity: The region’s high humidity levels can cause condensation buildup, especially in poorly ventilated areas, leading to mold and mildew growth.
  • Aging Plumbing Systems: Older homes in San Antonio often have outdated plumbing, making them more susceptible to leaks, pipe bursts, and other forms of water damage.

By understanding these causes, you can better prepare and protect your home from potential water damage.

Category 1: Clean Water Damage

bathtub overflow category of water damage clean

Common Causes in San Antonio

Clean water damage, also known as Category 1 water damage, involves water from a sanitary source. Common causes include leaking pipes, overflowing sinks, and bathtub accidents. In San Antonio, clean water damage is often due to plumbing issues exacerbated by the region’s hard water, which can cause mineral buildup and lead to pipe corrosion over time.

How to Manage Clean Water Damage

When dealing with clean water damage, time is of the essence. Even though the water is clean, it can still cause significant damage if not addressed promptly. Here’s what you can do:

  1. Turn Off the Water Source: If the water damage is due to a plumbing issue, locate and turn off the main water valve to stop the flow.
  2. Remove Excess Water: Use mops, towels, or a wet/dry vacuum to remove as much water as possible. The faster you do this, the less damage your home will sustain.
  3. Dry the Area Thoroughly: Use fans, dehumidifiers, and open windows to increase airflow and speed up the drying process. Moisture left behind can lead to mold growth.
  4. Inspect for Hidden Damage: Even if the surface looks dry, there may be moisture trapped underneath floors or behind walls. Consider using moisture detectors to check for hidden dampness.

Preventive Tips

To prevent clean water damage, it’s essential to regularly inspect your plumbing system, especially in older homes. Consider installing a water softener to reduce the impact of San Antonio’s hard water on your pipes. Additionally, routine maintenance, such as checking for leaks and addressing minor issues promptly, can help you avoid more significant problems down the line.

Category 2: Gray Water Damage

washing machine leak category water damage gray

Common Causes in San Antonio

Gray water, or Category 2 water damage, refers to water that is contaminated with chemicals, detergents, or other pollutants. In San Antonio, common sources of gray water damage include washing machine overflows, dishwasher leaks, and minor flooding from heavy rains. Homes with older appliances or those that haven’t been regularly maintained are at a higher risk for this type of damage.

How to Manage Gray Water Damage

Gray water damage requires more caution than clean water damage due to the potential health risks from contamination. Here’s how to handle it:

  1. Wear Protective Gear: When dealing with gray water, it’s important to wear protective clothing, gloves, and masks to avoid contact with the contaminated water.
  2. Contain and Remove the Water: Use a wet/dry vacuum or pump to remove the water, being careful to avoid spreading it to unaffected areas.
  3. Clean and Disinfect: After removing the water, clean and disinfect the affected area thoroughly. Use a bleach solution or a commercial disinfectant to kill bacteria and prevent mold growth.
  4. Dry the Area: As with clean water damage, it’s crucial to dry the area completely. Use dehumidifiers and fans to ensure all moisture is eliminated.

Preventive Tips

To prevent gray water damage, regularly maintain your appliances and check hoses and connections for signs of wear or leaks. Consider upgrading older appliances to more efficient models that are less likely to cause problems. Also, ensure your home’s drainage system is in good condition to prevent water from backing up into your home during heavy rains.

Category 3: Black Water Damage

category 3 black water after flood

Common Causes in San Antonio

Black water, or Category 3 water damage, is the most severe type and involves water that is highly contaminated. In San Antonio, black water damage is often caused by sewage backups, major flooding from local rivers, or storms. Flash floods, which are common in the area, can bring in water that’s contaminated with chemicals, bacteria, and other hazardous materials.

How to Manage Black Water Damage

Black water damage is extremely dangerous and should be handled by professionals. Here’s what you can do until help arrives:

  1. Evacuate the Area: Black water is highly toxic. Evacuate the affected area immediately to avoid exposure to harmful contaminants.
  2. Turn Off Utilities: If it’s safe to do so, turn off electricity, gas, and water to prevent further hazards.
  3. Avoid Contact with the Water: Do not attempt to remove black water on your own. Avoid any contact with the water, as it can pose serious health risks.
  4. Call a Professional Restoration Company: Black water damage requires specialized equipment and expertise. Contact a professional restoration company as soon as possible to handle the cleanup and restoration process.

Preventive Tips

Preventing black water damage involves regular maintenance of your sewage system and being prepared for flash floods. Install backflow valves in your plumbing to prevent sewage from backing up into your home. Additionally, stay informed about local weather conditions and have an emergency plan in place for potential flooding.

San Antonio-Specific Prevention Tips

Regular Home Maintenance

Regular maintenance is crucial to preventing water damage in your San Antonio home. Inspect your plumbing, roofing, and foundation regularly to catch any potential issues early. Pay special attention to areas prone to leaks or moisture buildup, such as basements, attics, and around windows and doors.

Flood Preparedness

San Antonio is prone to flash floods, so it’s essential to be prepared. Keep gutters and downspouts clear of debris to ensure proper drainage. Consider installing flood barriers or sandbags around your home’s perimeter if you live in a flood-prone area. For more detailed information on flood preparedness, you can refer to the Federal Emergency Management Agency’s (FEMA) guidelines on hazard mitigation planning.

When to Seek Professional Help

Identifying Situations Beyond DIY

While some water damage can be handled on your own, certain situations require professional intervention. If the water damage involves gray or black water, or if the affected area is extensive, it’s best to call in professionals. Additionally, if you notice structural damage or persistent mold growth, professional restoration is necessary to ensure your home is safe and secure.

Choosing the Right Restoration Company in San Antonio

When choosing a restoration company, look for one with experience in handling water damage specific to San Antonio. They should have the necessary equipment and expertise to address all water damage categories safely and effectively. Complete Restoration in San Antonio offers comprehensive services, from initial assessment to full restoration, ensuring your home is returned to its pre-damage condition.

Final Thoughts 

Water damage is a serious issue that can have long-lasting effects on your home if not addressed promptly and correctly. Understanding the different water damage categories and their common causes in San Antonio is the first step in protecting your home. By taking preventive measures and knowing when to call in professionals, you can minimize the impact of water damage and keep your home safe.

If you’re dealing with water damage or want to take preventive steps, Complete Restoration is here to help. Our team of experts is equipped to handle any water damage situation, providing you with peace of mind and a safe, dry home. Contact us today to schedule a consultation and protect your San Antonio home from the risks of water damage.

mold spores in San Antonio home with mold on wall

Have you detected a persistent musty smell in your San Antonio home? This unpleasant odor might be more than just a nuisance; it could be a critical red flag indicating the presence of mold. Mold issues not only compromise indoor air quality but can also lead to significant health problems and structural damage. At Complete Restoration, we specialize in addressing mold problems effectively through comprehensive remediation processes. In this blog post, we’ll explore the red flags that suggest mold growth, delve into the remediation process, and explain why professional services are essential for maintaining a safe and healthy home.

Recognizing Red Flags for Mold

Detecting mold early can prevent severe issues down the line. Here are some key red flags to watch out for:

  1. Persistent Musty Smell: A musty odor that lingers in your home is often one of the first signs of mold. This smell is produced by mold spores and microbial volatile organic compounds (MVOCs) that mold releases. If the smell persists despite cleaning and ventilation efforts, it’s a strong indicator that mold may be present.
  2. Visible Mold Growth: Mold often appears as fuzzy or slimy patches in various colors, such as black, green, or white. It can grow on surfaces like walls, ceilings, or behind wallpaper and carpets. If you spot visible mold, it’s crucial to address the issue immediately and seek professional help.
  3. Water Stains and Discoloration: Water stains on ceilings or walls, or discoloration in these areas, can signal past or current moisture issues that often lead to mold growth. These stains are a sign that moisture has been seeping into your home, creating an environment conducive to mold.
  4. High Humidity Levels: Mold thrives in humid conditions. If you notice consistently high humidity levels in your home, especially in areas like basements, bathrooms, or kitchens, this can create a perfect breeding ground for mold. Maintaining humidity levels below 60% is crucial for preventing mold growth.
  5. Health Symptoms: Mold exposure can cause various health issues, including respiratory problems, allergic reactions, and skin irritation. If you or your family members experience these symptoms, especially when in certain areas of the home, it may be related to mold.
  6. Peeling Paint or Wallpaper: Mold can cause paint or wallpaper to peel or bubble as moisture accumulates behind these surfaces. If you notice peeling or bubbling, it could be a sign of hidden mold.
  7. Musty Smell in HVAC Systems: A musty odor emanating from your air conditioning or heating system could indicate mold growth in the ducts or components. This can spread mold spores throughout your home, exacerbating the problem.

The Importance of Professional Mold Remediation

If you notice any of these red flags, it’s essential to call a professional for mold testing and remediation. Here’s why:

  1. Accurate Mold Detection: Professionals can detect mold that may be hidden behind walls, under flooring, or in other concealed areas. Early detection through professional testing ensures that mold problems are addressed comprehensively.
  2. Identify Mold Type and Extent: Different types of mold require different remediation strategies. Professional testing identifies the type of mold and assesses the extent of the infestation, allowing for a tailored remediation approach.
  3. Protect Your Health: Mold exposure can lead to serious health issues. Professional remediation minimizes health risks by ensuring that mold is effectively removed and that your indoor air quality is restored.
  4. Prevent Property Damage: Mold can cause significant damage to your home’s structure and materials. A professional remediation process helps prevent extensive damage and reduces the costs associated with repairs.
  5. Effective Remediation: A thorough inspection report will provide detailed guidelines for addressing the mold issue, ensuring that all affected areas are treated effectively to prevent future problems.

The Mold Remediation Process with Complete Restoration

At Complete Restoration, we follow a comprehensive remediation process to ensure your home is safe and mold-free. Here’s what you can expect:

  1. Initial Assessment: Our team begins with a detailed visual inspection of your home to identify visible mold and any signs of moisture problems. We also discuss recent water issues or health symptoms that could indicate a mold problem.
  2. Mold Testing: We conduct thorough mold testing, including air sampling and surface sampling, to detect the presence and type of mold. This helps us understand the extent of the contamination and tailor our remediation plan accordingly.
  3. Containment: To prevent mold spores from spreading to other areas of your home, we establish containment barriers. This involves sealing off affected areas with plastic sheeting and setting up negative air pressure systems to control airflow.
  4. Removal and Cleanup: We remove and properly dispose of contaminated materials, such as drywall, insulation, or carpeting. Our team uses specialized equipment to clean and disinfect affected surfaces, ensuring that all mold is removed.
  5. Moisture Control: Addressing the source of moisture is crucial for preventing future mold growth. We repair any leaks, improve ventilation, and use dehumidifiers to control humidity levels and eliminate the conditions that support mold growth.
  6. Restoration: Once the mold has been removed and the area is dry, we begin the restoration process. This includes repairing any damage caused by the mold and restoring affected areas to their pre-damage condition.
  7. Final Inspection: After remediation, we conduct a final inspection to ensure that all mold has been removed and that the area is safe. We also provide you with recommendations for maintaining a mold-free environment moving forward.

When to Contact Complete Restoration

If you encounter any of the red flags mentioned earlier or suspect mold in your San Antonio home, don’t hesitate to reach out to Complete Restoration. Our professional team is equipped to handle mold problems of all sizes, ensuring a thorough and effective remediation process.

Preventing Future Mold Issues

After addressing any current mold problems, take steps to prevent future issues:

  • Control Humidity: Use dehumidifiers and ensure proper ventilation in areas prone to high humidity.
  • Fix Leaks Promptly: Address any leaks or water issues immediately to prevent moisture buildup.
  • Regular Inspections: Schedule regular inspections to catch potential mold problems early.

Conclusion

A musty smell in your San Antonio home can be a significant indicator of mold growth, which poses health risks and potential property damage. At Complete Restoration, we specialize in comprehensive mold remediation to ensure your home is safe and healthy. If you notice any red flags or suspect mold, contact us today to schedule a thorough inspection and remediation process. Protect your home and your health with professional mold removal and prevention services from Complete Restoration.

water leaking from your ceiling

Water leaking from your ceiling can be more than just a nuisance; it can be a sign of significant underlying issues. In San Antonio, where the weather can be unpredictable, homeowners must stay vigilant about the health of their homes. Ignoring signs of water damage on the ceiling can lead to costly repairs and potential health risks. In this comprehensive guide, we’ll explore the causes, signs, and solutions for water leaking from your ceiling to help you protect your home and family.

Causes of Water Leaking from Your Ceiling

Understanding the root cause of water leaks is the first step in addressing the problem. Here are some common culprits:

1. Roof Damage

The most common cause of water leaking from the ceiling is roof damage. San Antonio’s weather, including heavy rains and high winds, can compromise your roof’s integrity. Missing shingles, cracked tiles, or damaged flashing can allow water to seep through, eventually finding its way to your ceiling.

2. Plumbing Issues

Leaky or burst pipes within your home’s plumbing system can cause water to leak from the ceiling. This is especially common in older homes where pipes may have deteriorated over time. Water from bathrooms or kitchens located on the upper floors can also lead to ceiling leaks.

3. HVAC System Problems

Your heating, ventilation, and air conditioning (HVAC) system can also be a source of leaks. Condensation from AC units or water from malfunctioning units can drip through ceilings, especially if drain lines are clogged or damaged.

4. Clogged Gutters

Gutters that are clogged with leaves and debris can overflow, causing water to spill over the edges and seep into the roof and ceiling. Regular gutter maintenance is essential to prevent this type of damage.

5. Attic Condensation

Inadequate insulation or ventilation in your attic can lead to condensation build-up, which can drip down onto the ceiling. This is a common issue in homes with poor attic maintenance.

Signs of Water Damage on the Ceiling

Early detection of water damage can save you from expensive repairs and extensive damage. Look out for these signs:

1. Discoloration and Stains

Water stains are often the first noticeable sign of a ceiling leak. These stains can appear as yellow, brown, or rust-colored patches on the ceiling. They may start small and grow over time as the leak worsens.

2. Peeling or Bubbling Paint

When water seeps into the ceiling, it can cause the paint to peel or bubble. This is a clear indication that moisture is trapped behind the paint layer, and it needs to be addressed immediately.

3. Sagging Ceiling

A ceiling that sags or appears swollen is a severe sign of water damage. This could indicate that the structural integrity of the ceiling is compromised, and immediate action is required to prevent collapse.

4. Musty Odors

Persistent musty odors in your home could be a sign of mold or mildew growth due to water leaks. Mold thrives in moist environments and can pose serious health risks if left untreated.

5. Visible Mold

Mold growth on the ceiling is a clear indication of prolonged water exposure. Mold can appear in various colors, including black, green, or white, and requires professional removal to ensure your home’s safety.

Solutions for Water Leaking from Your Ceiling

Addressing water leaks promptly is crucial to prevent further damage. Here are some steps you can take:

1. Identify the Source

The first step in fixing a ceiling leak is to identify the source of the water. This may require a thorough inspection of your roof, plumbing, HVAC system, or gutters. Hiring a professional restoration company like Complete Flood Restoration can ensure a comprehensive inspection and accurate diagnosis.

2. Repair Roof Damage

If roof damage is the cause, it’s essential to repair or replace damaged shingles, tiles, or flashing. Ensure your roof is properly sealed to prevent future leaks. Regular roof inspections and maintenance can help you catch problems early.

3. Fix Plumbing Leaks

For plumbing-related leaks, a licensed plumber should repair or replace the damaged pipes. It’s also a good idea to inspect your plumbing system regularly to catch potential issues before they become major problems.

4. Maintain HVAC Systems

Ensure your HVAC system is functioning correctly by scheduling regular maintenance. Clean or replace air filters, check for clogged drain lines, and ensure proper installation to prevent leaks.

5. Clean and Repair Gutters

Regularly clean your gutters to prevent blockages. If your gutters are damaged, repair or replace them to ensure proper water flow away from your home.

6. Improve Attic Ventilation

Proper attic insulation and ventilation can prevent condensation build-up. Make sure your attic has adequate ventilation to allow moisture to escape and prevent it from dripping onto the ceiling.

7. Dry and Repair Damaged Areas

Once the source of the leak is addressed, it’s crucial to dry the affected areas thoroughly. Remove damaged materials, such as wet insulation or drywall, and replace them to prevent mold growth. Dehumidifiers and fans are used to aid in the drying process.

The Importance of Professional Restoration Services

While some minor leaks can be handled with DIY methods, significant water damage requires professional intervention. Here’s why you should consider hiring Complete Flood Restoration:

1. Expertise and Experience

Complete Flood Restoration has years of experience dealing with water damage in San Antonio. Our team of experts can quickly identify the source of the leak and implement effective solutions to prevent further damage.

2. Advanced Equipment

We use state-of-the-art equipment to detect hidden moisture, dry affected areas, and restore your home to its original condition. Our tools and techniques ensure thorough and efficient restoration.

3. Prevent Mold Growth

Mold can start growing within 24-48 hours of water exposure. Our team will ensure all affected areas are dried and treated to prevent mold growth, safeguarding your health and home.

4. Comprehensive Restoration

From initial inspection to complete restoration, we handle every step of the process. This includes water extraction, drying, mold remediation, and repairs, ensuring your home is safe and habitable.

Preventative Measures to Avoid Future Leaks

Prevention is always better than cure. Here are some tips to avoid future water leaks:

1. Regular Inspections

Schedule regular inspections of your roof, plumbing, HVAC system, and gutters. Catching potential issues early can save you from costly repairs down the line.

2. Maintain Your Home

Regular maintenance, such as cleaning gutters, replacing worn-out roof shingles, and servicing HVAC systems, can prevent leaks and prolong the life of your home’s components.

3. Address Issues Promptly

If you notice any signs of water damage, address them immediately. Delaying repairs can lead to more extensive damage and higher repair costs.

4. Install Water Alarms

Water alarms can alert you to leaks before they cause significant damage. Install them in areas prone to leaks, such as basements, bathrooms, and kitchens.

Conclusion

Water leaking from your ceiling is a serious issue that requires prompt attention. By understanding the causes, recognizing the signs, and taking swift action, you can protect your San Antonio home from extensive damage. Complete Flood Restoration is here to help with professional, reliable services to restore your home and peace of mind. Don’t let water damage disrupt your life; contact us today for a comprehensive inspection and effective solutions.

rental application with pen that requires renters insurance

Water damage is one of the most common issues renters face, yet understanding how renters insurance covers such incidents can be confusing. Is your personal property covered? What about the stuff the water ruins? Here at Complete Restoration, we want to make things easier for you by breaking down how renters insurance works when it comes to water damage.

What Renters Insurance Typically Covers

Basic Coverage

Renters insurance provides several essential protections to safeguard your belongings and well-being. Here are the primary components:

  1. Personal Belongings:

  Renters insurance covers the replacement or repair of personal property lost or damaged due to a covered incident, such as fire or theft. Items like furniture, electronics, and clothing typically fall under this category. Having this coverage means you’ll be compensated for your loss without shouldering the full financial burden.

  1. Liability Coverage:

  This coverage protects you if someone is injured in your rental unit or if you accidentally damage someone else’s property. Liability coverage can help pay for medical expenses, legal fees, and repair costs, providing peace of mind in unexpected situations.

  1. Additional Living Expenses:

  If your rental becomes uninhabitable due to a covered event, renters insurance can help cover the costs of temporary housing. This includes hotel stays, food, and other necessary expenses until your rental is livable again. This coverage ensures you don’t have to worry about finding a place to stay or paying extra out of pocket.

Water Damage Coverage

Understanding how water damage is covered under renters insurance is crucial for protecting your property:

  1. Sudden Accidental Water Damage:

  Renters insurance typically covers unexpected and accidental water damage, such as a burst pipe or an appliance overflow. These incidents are usually unforeseen and result in immediate damage, warranting coverage under your policy.

  1. Burst Pipes and Appliance Overflows:

  Specific scenarios like burst pipes or washing machine malfunctions are generally covered. This means if your washing machine suddenly overflows or a pipe bursts during a cold snap, resulting in water damage to your belongings, your insurance policy should cover the costs of repair or replacement.

Common Exclusions

While renters insurance provides extensive coverage, it’s essential to understand its limitations:

  1. Flood Damage:

  Flood damage is not typically covered under standard renters insurance policies. To protect against floods, you’ll need a separate flood insurance policy. This exclusion highlights the importance of understanding your policy’s specifics and considering additional coverage if you live in a flood-prone area.

  1. Gradual Leaks and Maintenance Issues:

  Damage resulting from slow leaks or lack of maintenance is usually not covered. This includes issues like mold growth due to unnoticed water seepage or damage from a neglected roof leak. Regular maintenance and prompt reporting of any issues to your landlord can help prevent these problems and ensure you’re not left uncovered.

Types of Water Damage Scenarios for Renters

Accidental Discharges

These are the sudden, unexpected releases of water that can lead to significant damage:

  1. Overflowing Bathtubs or Sinks:

  Accidents happen, and an overflowing bathtub or sink can cause considerable water damage. Renters insurance typically covers such incidents, ensuring you can address the damage without incurring hefty costs.

  1. Appliance Malfunctions:

  Washing machines, dishwashers, and other appliances can malfunction, leading to water spills that damage floors, walls, and personal items. Renters insurance generally covers these scenarios, helping you manage the aftermath and repair the damage.

Pipe Bursts

Pipe bursts can occur due to various reasons, often leading to significant water damage:

  1. Cold Weather-Related Bursts:

  During winter, pipes can freeze and burst, causing water to flood your rental unit. Renters insurance usually covers the resulting damage, providing financial relief during such emergencies.

  1. Plumbing Failures:

  Plumbing issues, such as corroded pipes or sudden pipe bursts, are also covered. This means you can address the damage and repair your property without worrying about the costs.

Filing a Water Damage Claim as a Renter

Steps to Take

When water damage occurs, taking immediate and appropriate action is crucial:

  1. Immediate Actions:

  Stop the water source if possible, and move your belongings to prevent further damage. Quick action can help minimize the extent of the damage and make the claims process smoother.

  1. Documenting the Damage:

  Take photos and videos of the damage, and create an inventory list of affected items. Detailed documentation is essential for supporting your insurance claim and ensuring you receive appropriate compensation.

  1. Notifying the Landlord and Insurance Company:

  Inform your landlord about the damage and contact your insurance company to start the claims process. Prompt communication with both parties ensures timely assistance and resolution.

Tips for a Successful Claim

To maximize your chances of a successful claim, consider these tips:

  1. Detailed Documentation:

  Maintain thorough records of the damage, including photos, videos, and an inventory list of affected items. This evidence can support your claim and help the insurance company assess the extent of the damage accurately.

  1. Clear Communication:

  Keep open lines of communication with all parties involved, including your landlord and insurance company. Clear and consistent communication ensures everyone is on the same page and can help expedite the claims process.

  1. Understanding Your Policy’s Specifics:

  Familiarize yourself with your renter’s insurance policy’s terms, conditions, and coverage limits. Knowing what your policy covers and excludes can help you manage your expectations and ensure a smoother claims process.

Why Professional Water Damage Restoration is Important for Renters

Health and Safety

Professional water damage restoration is crucial for maintaining a safe and healthy living environment:

  1. Preventing Mold Growth:

  Water damage can lead to mold growth, which poses health risks such as respiratory issues and allergies. Professional restoration services ensure thorough drying and mold remediation, preventing these hazards and safeguarding your health.

  1. Ensuring a Safe Environment:

  Water damage can compromise the structural integrity of your rental unit, leading to potential hazards. Professional restoration services address these issues, ensuring your living space is safe and habitable.

Restoration Process

Professional water damage restoration involves several critical steps to restore your property:

  1. Water Extraction and Drying:

  Experts use specialized equipment to extract water and dry affected areas thoroughly. This process helps prevent further damage and minimizes the risk of mold growth.

  1. Mold Remediation and Repairs:

  Restoration professionals address mold growth and repair any structural damage caused by water. This comprehensive approach ensures your rental unit is restored to its pre-damage condition.

Complete Restoration’s Expertise for Renters in San Antonio

Local Risks and Common Issues

San Antonio renters face unique challenges related to water damage:

  1. Climate-Related Risks:

  San Antonio’s climate, characterized by heavy rains and occasional flooding, can increase the risk of water damage. Understanding these local risks can help renters take preventive measures and ensure they’re adequately covered.

  1. Older Rental Properties:

  Older rental properties may have outdated plumbing systems that are more prone to leaks and bursts. Regular inspections and prompt reporting of issues can help mitigate these risks.

Why Choose Complete Restoration?

Complete Restoration offers several advantages for renters dealing with water damage:

  1. Experience with Rental Properties:

  Our team has extensive experience working with rental properties, ensuring we understand renters’ unique needs and challenges. This expertise allows us to provide tailored solutions that address your specific situation.

  1. Quick and Efficient Service:

  We prioritize minimizing disruption to your daily life by providing prompt and efficient water damage restoration services. Our goal is to restore your rental unit quickly and effectively so you can resume your normal routine.

Preventive Measures for Renters

Routine Checks

Regular maintenance and inspections can help prevent water damage:

  1. Inspecting Appliances and Plumbing:

  Regularly check appliances like washing machines and dishwashers for signs of wear and tear. Inspect plumbing fixtures and pipes for leaks or corrosion, and report any issues to your landlord promptly.

  1. Reporting Issues Promptly:

  Addressing potential problems early can prevent more extensive damage and costly repairs. Communicate any concerns or maintenance needs to your landlord as soon as possible.

Safety Tips

Taking proactive steps can help minimize the risk of water damage:

  1. Minimizing Risk:

  Avoid overloading washing machines and dishwashers, and ensure they’re properly maintained. Use water alarms and shut-off devices to detect and prevent leaks.

  1. Importance of Renter’s Insurance:

  Securing renters insurance ensures you’re protected against unexpected water damage incidents. Review your policy regularly to understand your coverage and consider additional policies for specific risks like flooding.

FAQs

Common Questions about Renters Insurance and Water Damage

  1. How Does Renters Insurance Work for Water Damage?:

  Renters insurance covers sudden and accidental water damage incidents but excludes gradual leaks and maintenance issues. Understanding your policy’s specifics is crucial for managing expectations and ensuring adequate protection.

  1. How Does Renters Insurance Cover Water Damage from Sink Overflow?:

  Accidental sink overflows are typically covered by renters insurance, provided they result in sudden and unexpected damage. Promptly addressing the issue and documenting the damage can help ensure a successful claim.

  1. How Do I Make a Successful Water Leak Insurance Claim?:

  To maximize your chances of a successful claim, document the damage thoroughly, communicate clearly with all parties involved, and understand your policy’s terms and conditions. Taking these steps can help streamline the claims process and ensure appropriate compensation.

  1. What Does Renters Insurance Not Cover?:

  Renters insurance generally does not cover flood damage, gradual leaks, or maintenance-related issues. Consider additional policies for specific risks like flooding and practice regular maintenance to prevent problems.

  1. Does Renters Insurance Cover Water Damage in Texas?:

  Yes, renters insurance in Texas covers sudden and accidental water damage incidents but excludes flood damage and maintenance issues. Understanding your policy’s specifics is essential for ensuring adequate protection.

Conclusion

Water damage can be a significant concern for renters, but understanding your insurance coverage and knowing the right steps to take can make all the difference. At Complete Restoration, we specialize in helping renters navigate these challenges with expert restoration services and comprehensive support.

If you’re dealing with water damage in your rental property, don’t wait—contact Complete Restoration today. Our team of professionals is ready to assist you with prompt and effective water damage restoration services and ensure your home is safe and restored.

homeowners insurance policy

Does Homeowners Insurance Cover Water Damage Restoration?

Homeownership brings both joy and responsibility. One of the trickiest aspects can be dealing with water damage. It’s not just about the distress of seeing your home affected but also the confusion surrounding insurance claims. In this comprehensive guide, Complete Restoration will explore how homeowners insurance covers water damage and why professional restoration services are crucial for San Antonio homeowners.

Understanding Homeowners Insurance and Water Damage

Understanding your homeowner’s insurance policy is key to navigating water damage restoration. Insurance policies can be complex, but a solid grasp of the basics can make a significant difference when disaster strikes.

Types of Water Damage Covered by Insurance

Sudden Accidental Damage

One type of water damage generally covered by homeowners insurance is sudden accidental damage. This refers to unexpected events like a burst pipe or an appliance malfunction that causes water to flood your home. Insurers typically cover the cost of repairs and water damage restoration.

Burst Pipes and Leaks

Burst pipes and leaks are common issues that can lead to significant water damage. If a pipe bursts suddenly and causes damage, your insurance will likely cover it. However, if the leak is due to gradual wear and tear or poor maintenance, it might not be covered.

Does Home Insurance Cover Mold?

Mold can be a tricky situation. If mold results from a covered peril—such as a burst pipe—your insurance might pay for its remediation. However, if mold forms due to neglected maintenance or high humidity, this would typically fall under exclusions.

Does Homeowners Insurance Cover Water Leaks Under Foundation?

Water leaks under the foundation can cause severe damage. These scenarios are often complicated and may not be fully covered by standard homeowners insurance policies. Understanding the specifics of your coverage can prevent unpleasant surprises.

Exclusions to Be Aware Of

Gradual Damage

Gradual damage represents wear and tear over time. This includes issues like slow leaks or long-term water exposure. Most insurance policies do not cover gradual damage, so regular maintenance is essential to safeguard your home.

Negligence and Maintenance Issues

Negligence and lack of maintenance often lead to exclusions in insurance policies. Insurers expect homeowners to perform regular upkeep. Failure to do so can result in claim denials, emphasizing the need for proactive home care.

Why Professional Water Damage Restoration Matters

Importance of Timely Restoration

Timely restoration is critical. Water damage can escalate quickly, leading to mold growth and structural issues. Professional restoration services ensure swift action, mitigating further damage and expenses.

Preventing Mold Growth

Mold can develop within 24-48 hours of water exposure. Professional restoration services include mold remediation, preventing health hazards and further damage to your property.

Structural Integrity

Water can weaken your home’s structure. Professional restoration ensures thorough drying and repairs, preserving your home’s integrity and safety.

Services Provided by Restoration Companies

Water Extraction

One of the first steps in water damage restoration is water extraction. Professionals use specialized equipment to remove standing water quickly and efficiently, minimizing damage.

Drying and Dehumidification

After water extraction, drying and dehumidification are essential. Restoration companies use industrial-grade dehumidifiers and air movers to ensure all moisture is removed, preventing mold growth and structural damage.

Mold Remediation

If mold has started to grow, professional mold remediation is necessary. Restoration experts identify and remove mold, ensuring your home is safe and healthy.

How Does Insurance Work for Water Damage?

Filing a Claim for Water Damage

Filing a claim promptly is crucial. Notify your insurer as soon as possible, detailing the damage and the cause.

Documenting the Damage

Proper documentation can make or break your claim. Take photos and videos of the damage, and keep detailed notes of what was affected.

Working with Insurance Adjusters

Effective communication with insurance adjusters can streamline the claims process. Provide all necessary documentation and be clear about the extent of the damage.

How to Make a Successful Water Leak Insurance Claim

Steps to Follow

Follow these steps to improve your chances of a successful claim:

  1. Report the damage immediately.
  2. Document everything.
  3. Keep receipts and records of repair estimates.

Tips for Maximizing Your Claim

Maximize your claim by:

  • Providing thorough documentation.
  • Being honest and detailed in your descriptions.
  • Follow up regularly with your insurer.

Why Would a Water Damage Claim Be Denied?

Common Reasons for Denial

Claims can be denied for several reasons:

  • Insufficient maintenance.
  • Non-covered perils.
  • Incomplete or inaccurate documentation.

Lack of Proper Maintenance

Regular maintenance is crucial. Neglecting upkeep can lead to claim denials since insurers expect homeowners to take reasonable care of their property.

Exclusions in the Policy

Be aware of your policy’s exclusions. Understanding what is and isn’t covered can prevent surprises and ensure you’re adequately protected.

Insufficient Documentation

Proper documentation is vital. Without clear evidence of the damage and its cause, your claim could be denied.

What Not to Say to a Home Insurance Adjuster?

Tips for Communicating with Adjusters

When speaking to adjusters, focus on facts and avoid speculation. Be clear and concise in your communication.

Avoiding Misstatements

Misstatements can harm your claim. Stick to the facts and avoid making assumptions about the damage or its cause.

Focusing on Facts

Stay factual. Provide clear evidence and documentation to support your claim, ensuring a smooth process.

Local Expertise from Complete Restoration in San Antonio

Understanding Local Risks

San Antonio faces unique risks, such as flooding and older plumbing systems. Understanding these risks can help you prepare and protect your home.

Flooding and Storms

Flooding and storms are common in San Antonio. Knowing how to deal with these events and having a reliable restoration company on hand can make all the difference.

Plumbing Issues in Older Homes

Older homes often have outdated plumbing. Regular inspections and maintenance can prevent water damage and costly repairs.

Choosing a Local Restoration Company

Choosing a local, trusted restoration company like Complete Restoration ensures timely and effective service. Look for reviews, certifications, and experience to make an informed choice.

Additional Resources For more information on homeowners insurance, water damage, and related topics, check out these authoritative resources:

Conclusion

Water damage can be a daunting challenge for any homeowner. With the right knowledge and professional help from Complete Restoration, San Antonio homeowners can navigate the insurance process effectively and restore their homes to their former glory. By understanding your policy, documenting damage accurately, and acting quickly, you can ensure a smoother restoration process.

For personalized assistance and expert restoration services, reach out to Complete Restoration. Protect your home and peace of mind today!

Flooding Room With Frame Hanging On Wall in need of Content Storage Services

Protecting Valuables with Our Content Storage Service

When disaster strikes the San Antonio, Texas, area, the effects can be devastating, both physically and emotionally. Flooding, water damage, fire damage, and other disasters not only impact your property but also put your valued possessions and cherished memories at risk. At Complete Restoration, we understand the importance of safeguarding your belongings during such challenging times. That’s why we offer our specialized Content Storage service – a reliable and secure solution to ensure your possessions remain safe and intact, even in the face of adversity.

Why Choose Complete Restoration’s Content Storage Service?

  1. Protection from Further Damage

After a flood or water damage, it’s crucial to prevent additional harm to your belongings. Leaving items in a damaged environment can lead to further water damage, mold growth, and deterioration. Water damage is categorized into different types based on the source of the water, each carrying varying levels of risk:

  • Clean Water: This type of water comes from sources like broken pipes or overflowing sinks. While it’s free from contaminants, it can still cause significant damage if not promptly addressed.
  • Black Water: This highly contaminated water comes from sources such as sewage backups and floodwaters that have come into contact with fecal matter. Black water poses severe health risks and requires specialized handling and remediation to prevent serious illness.
  • Gray Water: This water comes from sources like washing machines, showers, and sinks. While less contaminated than black water, gray water can still pose health risks and damage belongings if not properly addressed.

Our Content Storage service ensures that your items are moved to a secure, climate-controlled facility where they are shielded from these risks. This proactive measure not only preserves the physical condition of your possessions but also alleviates the emotional stress of potential losses.

  1. Professional Packing and Handling

Our experienced team takes the utmost care when packing and transporting your possessions. We understand that each item you own is precious and irreplaceable. Using appropriate packing materials and techniques, we ensure that every item is protected during the entire process. Whether it’s delicate antiques, valuable electronics, or everyday household items, we treat your belongings with the highest level of care and professionalism.

  1. Meticulous Inventory Management

We know that keeping track of your belongings during the chaotic time of damage restoration can be overwhelming. That’s why we utilize a comprehensive inventory management system to meticulously record every item we store. This system allows you to easily keep track of your possessions and ensures that nothing is lost or misplaced. You’ll have peace of mind knowing that your items are accounted for and securely stored.

  1. Flexible Storage Options

Whether you need short-term storage during the restoration process or long-term storage for items that won’t fit back into your property immediately, we have flexible storage options to meet your needs. Our adaptable solutions are designed to accommodate various situations and timelines, ensuring that your possessions are stored safely for as long as you need.

  1. Climate-Controlled Facilities

Our state-of-the-art storage facilities maintain ideal temperature and humidity levels to prevent damage from extreme conditions. This climate control is essential for preserving the integrity of sensitive items such as wooden furniture, documents, and electronics. By maintaining stable environmental conditions, we ensure that your belongings remain in pristine condition while in our care.

  1. Easy Access

Retrieving your items when you need them is a breeze with our Content Storage service. We provide convenient access to your stored belongings, ensuring you have what you need when you need it. Whether you’re in the midst of a home improvement project or waiting for your property to be fully restored, you can easily access your stored items without hassle.

  1. Peace of Mind

Knowing that your cherished possessions are safe and protected allows you to focus on the restoration process and get your life back on track. Our Content Storage service provides you with the peace of mind you deserve during a challenging time. With our secure storage solutions, you can rest assured that your valued items are in good hands.

San Antonio’s Trusted Leader In Restoration & Cleanup Since 2003

Complete Restoration has been serving the San Antonio community with excellence since 2003. Our commitment to quality service and customer satisfaction has made us a trusted leader in the restoration and cleanup industry. When you choose our Content Storage service, you’re partnering with a company that has a proven track record of helping homeowners recover from disasters.

  • Immediate Response Available, On Call 24/7: Disasters don’t wait, and neither do we. Our team is available around the clock to respond to your emergency.
  • FREE Estimates & Free Thermal Imaging: We offer free estimates and thermal imaging to assess the extent of the damage and provide you with accurate information.
  • Military & Law Enforcement Discounts: We honor those who serve by offering special discounts for military and law enforcement personnel.
  • We Work Directly With All Insurance Companies: Navigating insurance claims can be complicated. We work directly with your homeowners’ insurance company to make the process as smooth as possible.
  • Speak With A Certified Technician 24 Hours A Day: Our certified technicians are available 24/7 to answer your questions and provide expert advice.
  • Locally Owned & IICRC Certified: As a locally owned company, we are deeply committed to our community. Our IICRC certification ensures that we adhere to the highest industry standards.

The Process of Content Storage with Complete Restoration

  1. Assessment and Documentation

The first step in our Content Storage service is to assess the damage and document all items that need to be stored. Our team will conduct a thorough evaluation of your property and create a detailed inventory of your belongings.

  1. Packing and Transportation

Once the inventory is complete, our professional packers will carefully pack your items using high-quality materials. We ensure that each item is protected and securely packed for transportation. Our team then transports your belongings to our climate-controlled storage facility.

  1. Secure Storage

At our storage facility, your items are placed in a secure, climate-controlled environment. We monitor the temperature and humidity levels to ensure optimal conditions for preserving your belongings. Our facility is also equipped with advanced security systems to protect against theft and damage.

  1. Inventory Management

Throughout the storage period, we maintain a meticulous inventory of your items. You can access this inventory at any time to check the status of your belongings. If you need to retrieve an item, our system makes it easy to locate and access it quickly.

  1. Return of Items

When your property is restored and you’re ready to move your items back, our team will transport your belongings back to your home. We carefully unpack and place each item according to your specifications, ensuring a smooth and stress-free transition.

Trust Complete Restoration for Secure Content Storage

At Complete Restoration, we take pride in being your trusted partner during the aftermath of a disaster in Texas. Our Content Storage service is not just about keeping your items safe; it’s about preserving your memories and valued possessions. We understand that these items hold immense sentimental value and are irreplaceable. Our comprehensive service ensures that your belongings are protected from further damage, meticulously inventoried, and easily accessible when you need them. We provide the peace of mind you need to focus on rebuilding and restoring your life.

​​Additionally, our team is well-versed in mold remediation, ensuring that your items are not only stored securely but are also treated to prevent mold growth. This is crucial for avoiding long-term health risks and structural damage to your property.

Learn more from FEMA on protecting your property from flooding. 

Contact Complete Restoration Today

If you’re facing a disaster and need reliable content storage in San Antonio, look no further than Complete Restoration. Our team is ready to assist you 24/7, providing immediate response and expert care. Don’t let the stress of safeguarding your belongings add to your worries – let us handle it for you.

At Complete Restoration, your satisfaction is our priority. When you call us, you do not have to wait—we are on call 24/7 and will respond immediately. We can start work right away—you don’t have to wait for your insurance.

Call us now at 726-215-5248 or visit our Pack Up Service page to learn more about how we can help you protect your property.